
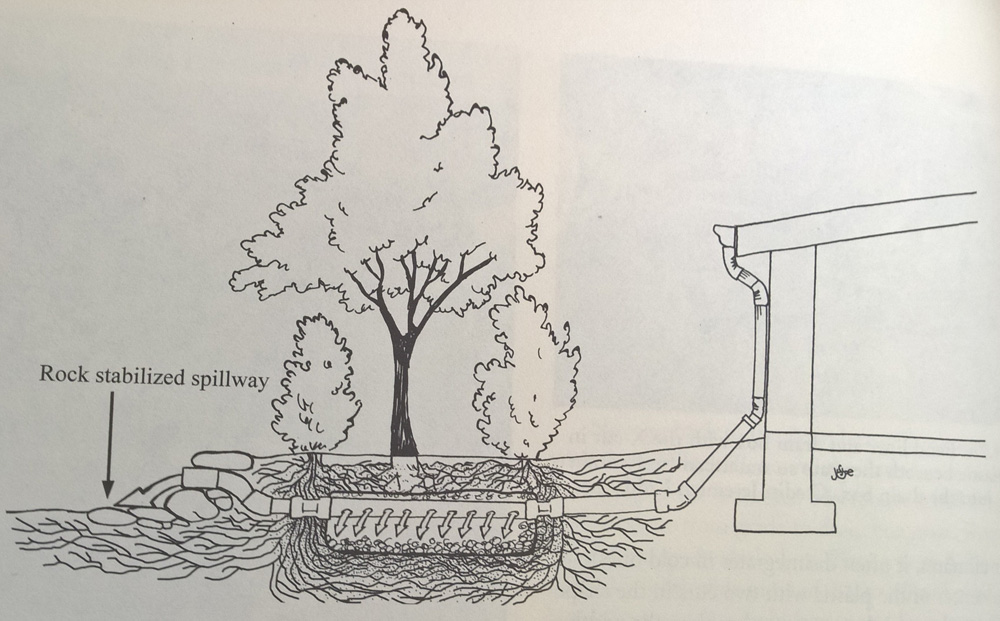
Credit: Rainwater Harvesting
In short, an infiltration trench is a trough in the ground for water to flow into for the purpose of recharging the water table and to provide precious moisture to plants and trees in the area. It is with a built with a passive overflow to reduce ponding and flooding on the property. Depending on available space and proximity to building structures can determine the size and available free volume for the infiltration trench to hold.
In our complete guide to building an infiltration trench, we’ll show you a thorough 6-step process of how to design an infiltration trench, where to build it, how to build it and what to fill it with. Finally we’ll show you a way to make it pretty in the landscape.
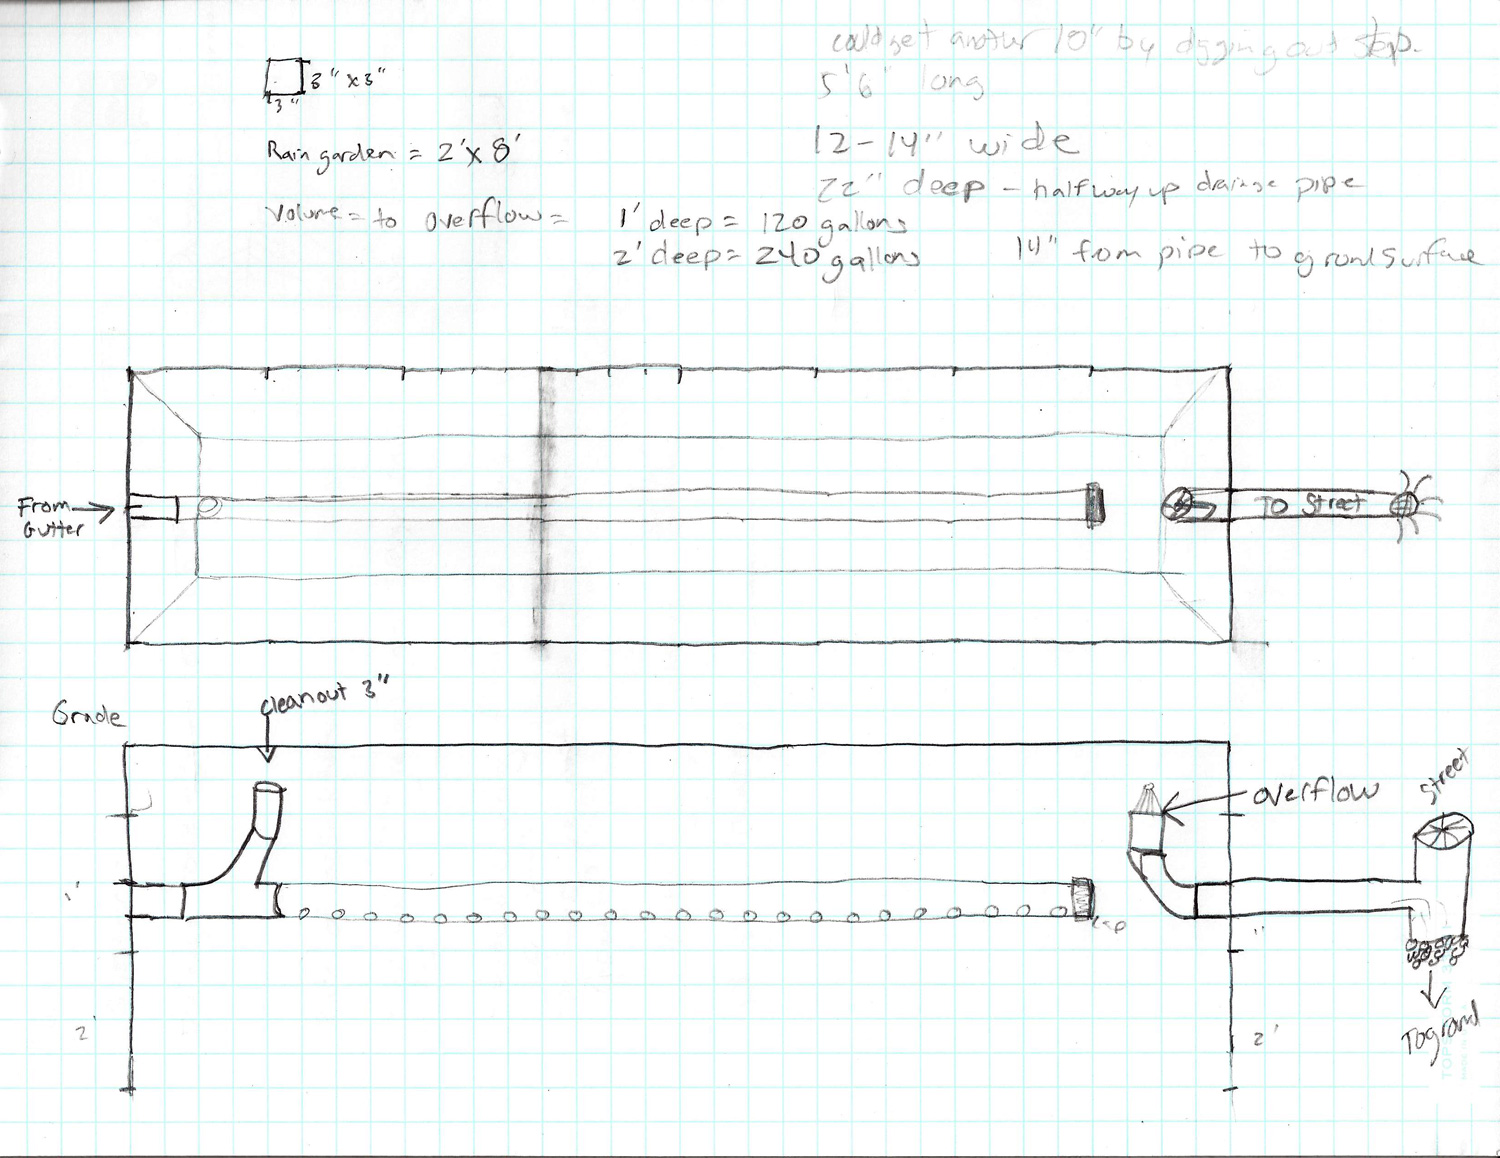
Hand drawn design
Designing an Infiltration Trench
You can either read about this in the book “Rainwater Harvesting for Drylands and Beyond (Vol. 2) – Water-Harvesting Earthworks” or can follow this quick little article about how I designed my own infiltration trench to take rainwater from my roof (the highest point on my property) and let it percolate into the ground (the lowest point).
The initial design then underwent a design review which included how to maintain it and keep the drain pipes clear. You’ll have to read on to see how that was done. (Read more…)
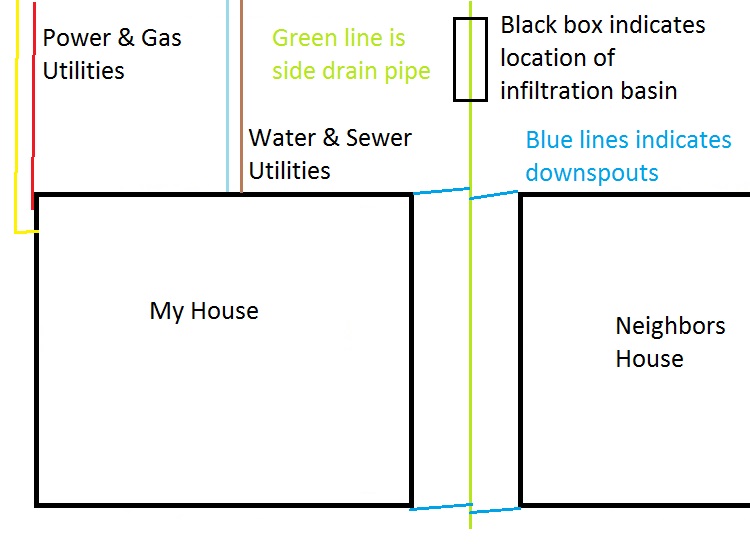
Drawing shows utilities, drain lines and best place for an infiltration basin.
How to: Where to Build a Rainwater Infiltration Trench
Location, location, location. You heard that phrase when you bought your house, it plays true when building a permanent water capturing device in your landscape.
A rule of thumb to follow is to ensure the trench will be at least 10 feet or more away from any building foundations and ensure there won’t be any utility lines in the same trench you want to dig. (Read more…)
Drainage gravel
How much water does drainage gravel displace?
Once you’ve figured out your design, it is worth figuring out what you’ll fill the trench with. If you went the drainage gravel route, it is worthwhile to get a sample of the gravel and determine how much water it will displace. Why?
If your intended drainage gravel will fill 66% of the available space in your trench, then your supposed 240 gallon trench will now only hold 79 gallons. Considerably less than the initial design. Will you be OK with that? (Read more…)
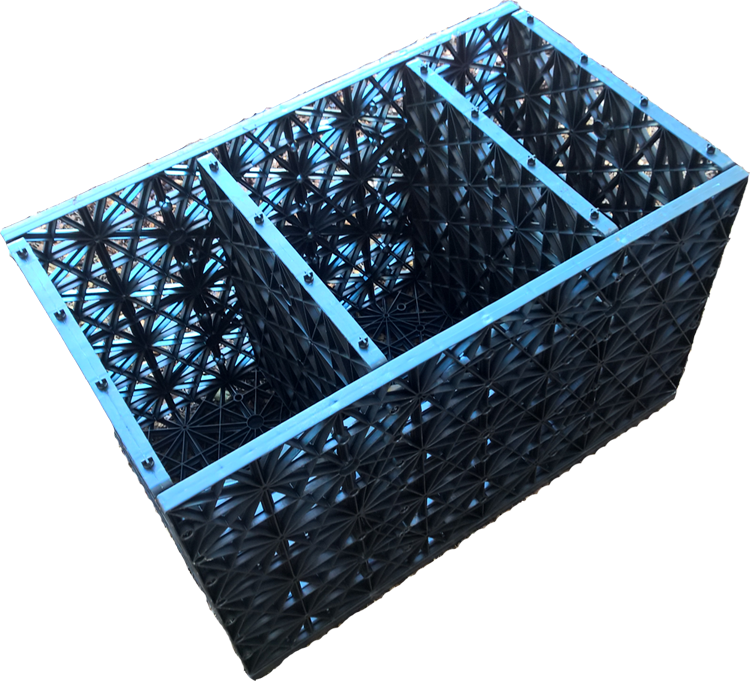
AquaBlox with a 95% void.
AquaBlox – a viable alternative to drainage gravel
While researching drainage gravel, AquaBlox popped up as a viable alternative. Light weight, relatively inexpensive, highly durable and allowed for a large open space in the ground (when compared to drainage gravel) proved to be something worthwhile.
I found two different sized AquaBlox at a local Ewing Irrigation store and set out to use them in my landscape. (Read more…)
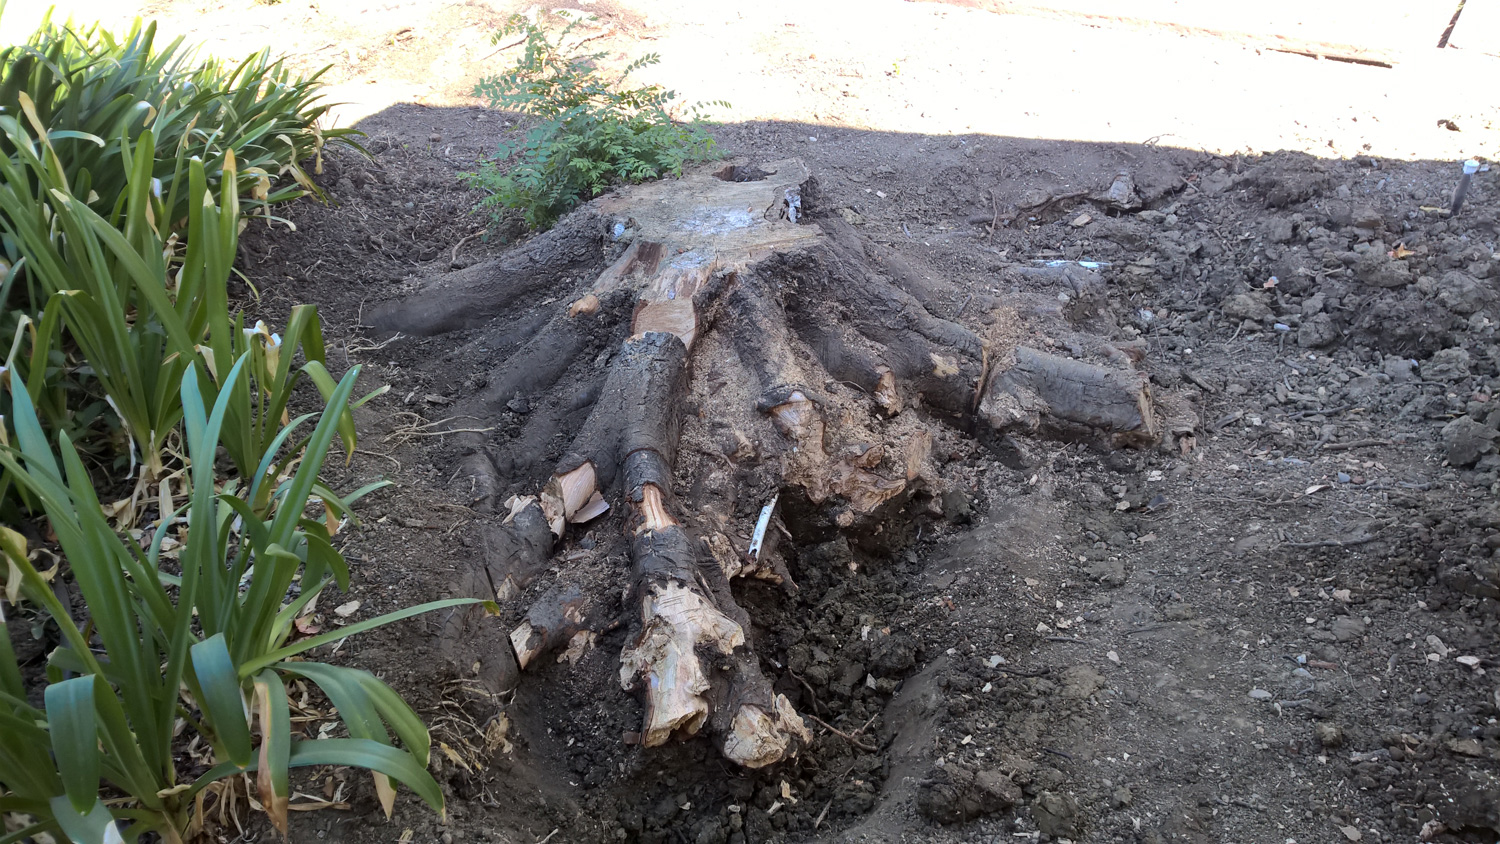
Birch stump removal, lots of dirt to dig away.
Site preparation for an infiltration trench
Before starting any digging process, be sure to have a plan for where you’re going to put the dirt. For me, it meant removing a dying tree, digging up roots and stumps from this tree and others in the same area before it and fixing my neighbors leaky sprinkler irrigation system.
Once the stump was removed, I had cleared enough room for the dirt I was planning to dig out from the trench. This helped as I didn’t need to haul any away. (Read more…)
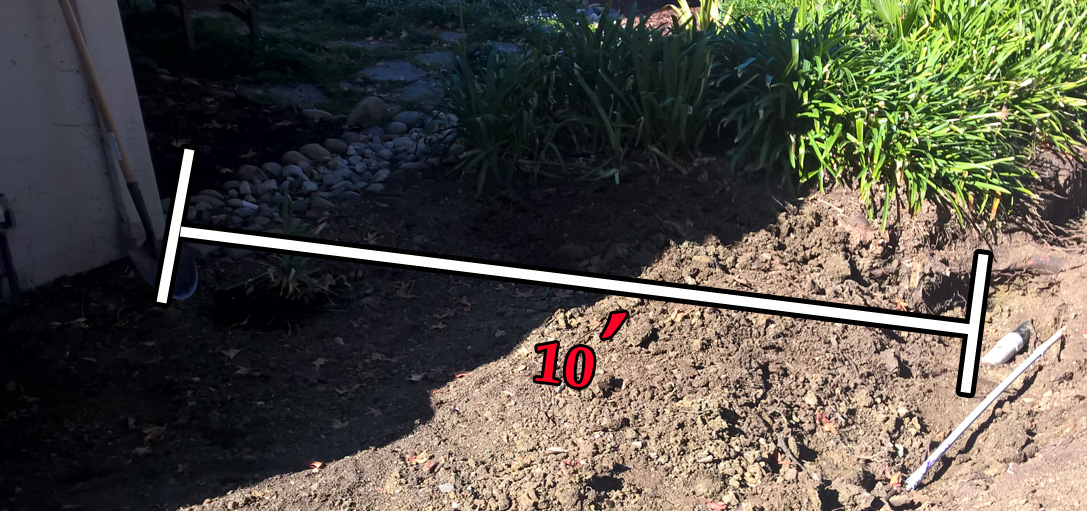
Start trench at least 10 feet from house foundation.
Digging an infiltration trench
Actual digging took place 10+ feet from the nearest building foundation. This ensures that any lateral water movement through the soil won’t affect the foundation. Also while digging and re-piping, a drain clean out was also installed for under $20.
Prior to installing the AquaBlox, a few tests of its functionality were performed to see how quickly the trench would absorb water. (Read more…)

Next AquaBlox ready to go in.
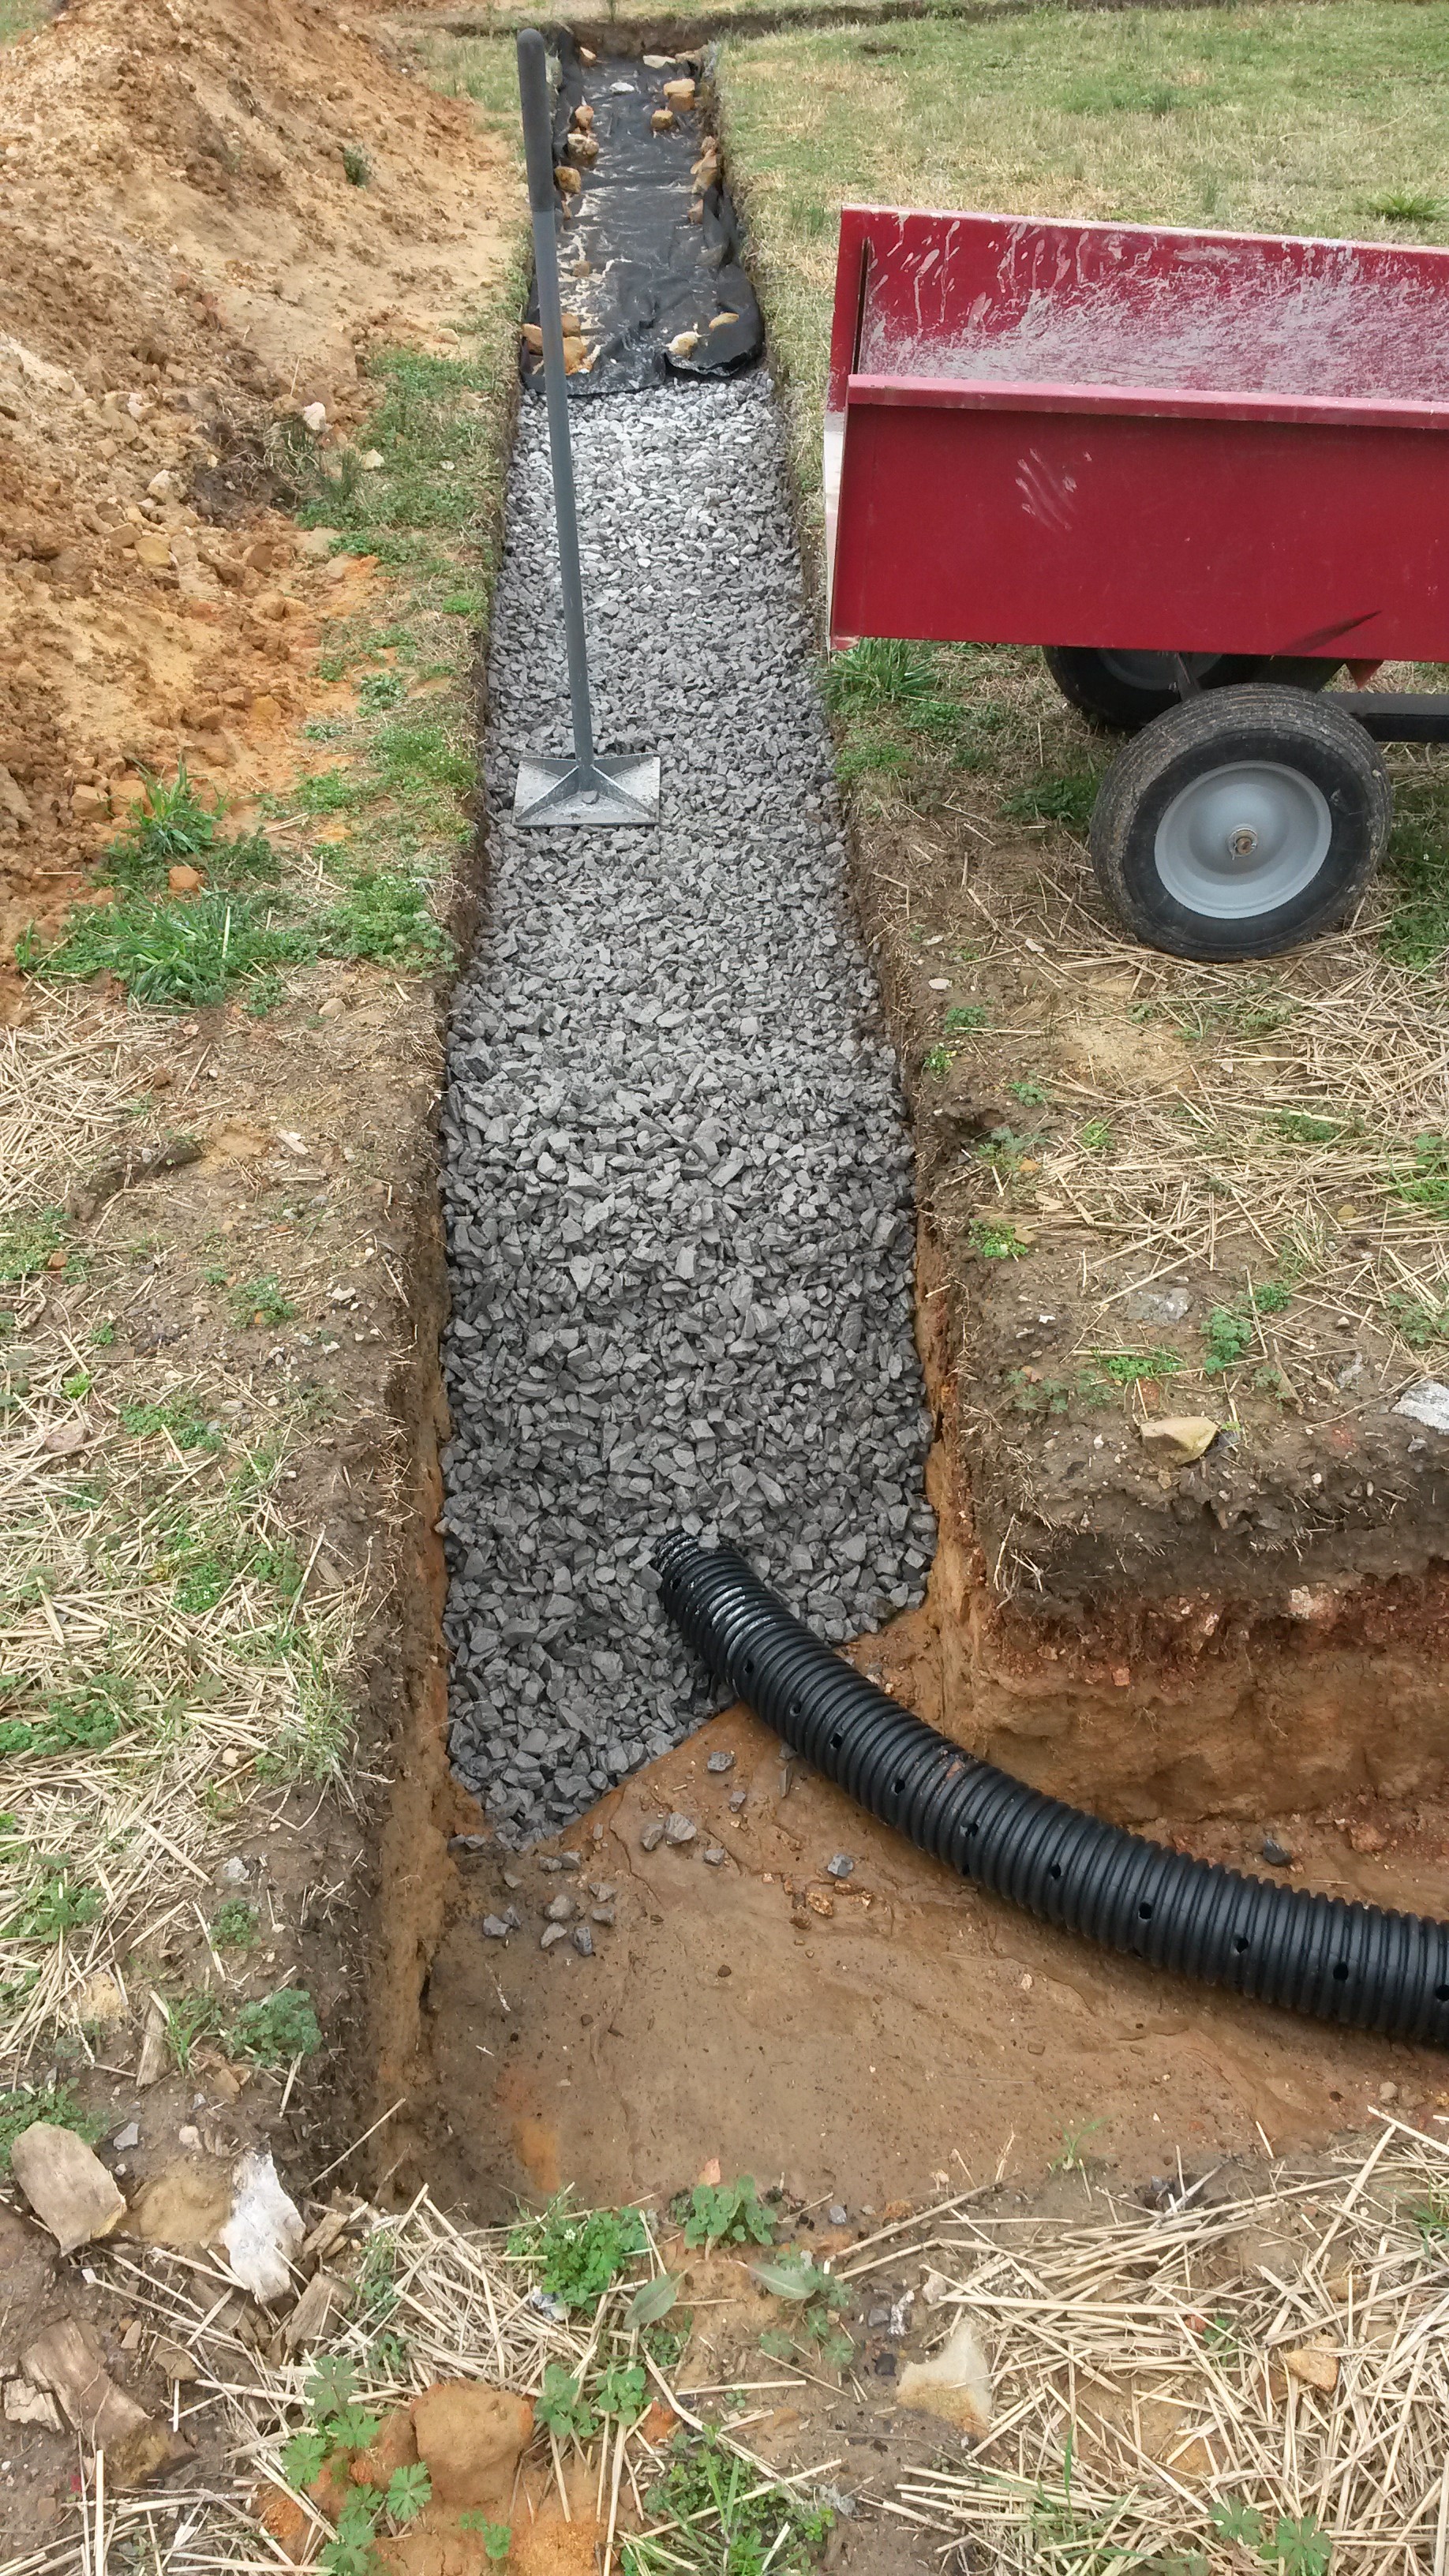
Installing AquaBlox into an infiltration trench
This article shows how I installed them into the infiltration trench using soil separator fabric, a drainage pipe, sand and gravel for backfill and final covering of the trench to bring it back to a natural landscape.
AquaBlox – an amazing invention made of recycled plastic, looks similar to a milk crate, has 3x more storage capacity than gravel and structural support for a car to drive over it. Plus, it weighs 15 pounds when built which enables significantly less body strain for installation (compared to drainage gravel). (Read more…)
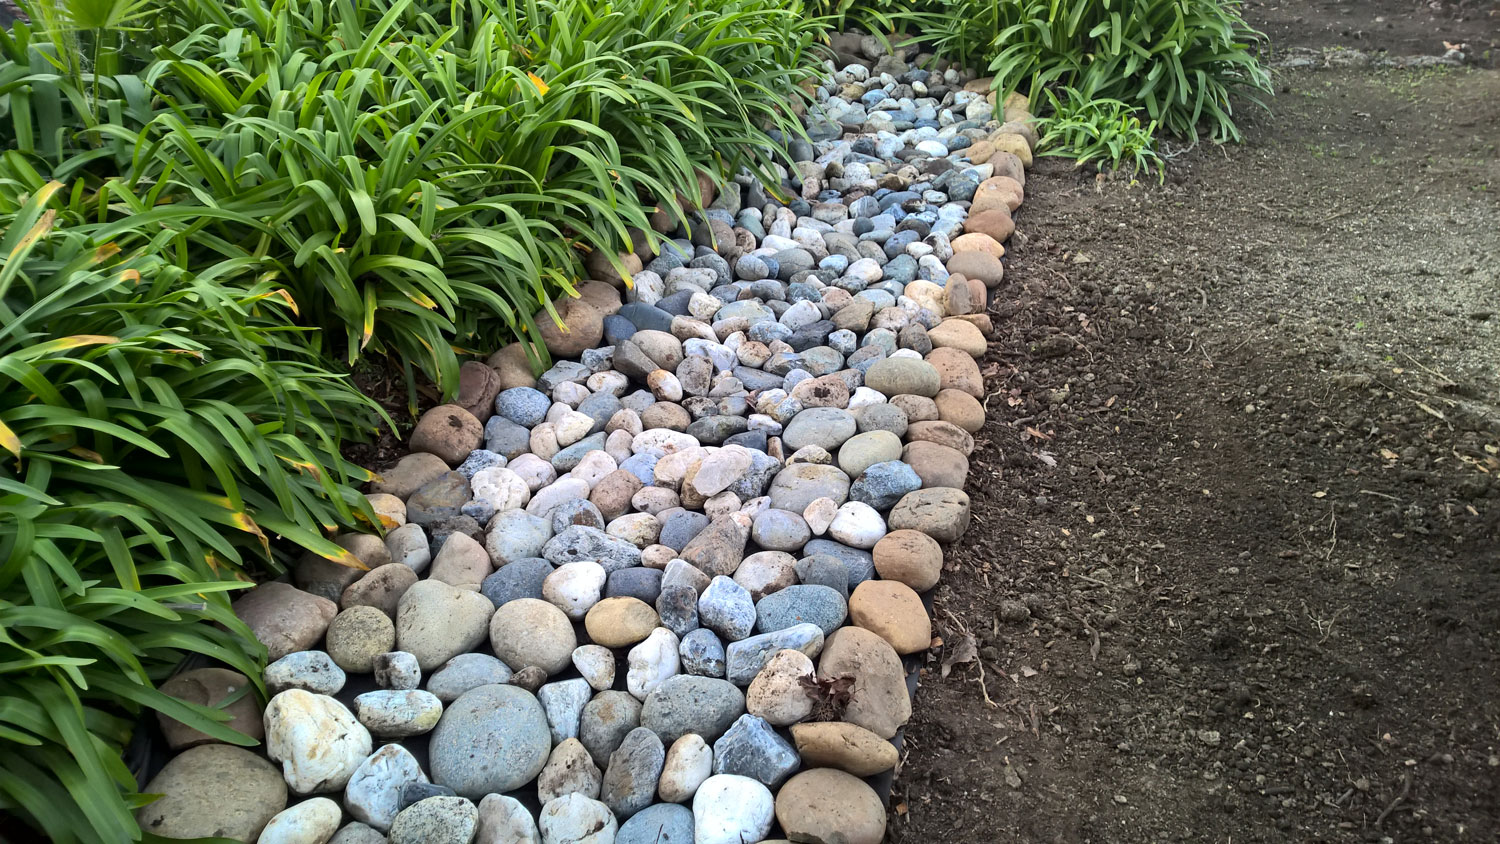
River rock overlay.
Beautifying an infiltration trench
The last step was to cover it to reduce human traffic. The riverrock is an example, we’re going to eventually plant a shallow root plant over it, which will “hide” the infiltration trench in plain sight.
The technique employed here can really be used for any kind of decorative rock overlay, anywhere. (Read more…)
That’s it! If you have any questions, pleas ask.
Leave a Reply