
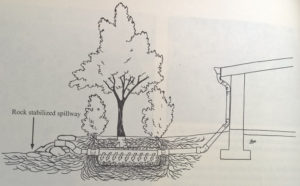
Eventual design from a Rainwater Harvesting book.
If you have been following along recently, you will have learned that Rainwater is the fountain of life, that you have the ability to Reduce Urban Runoff. The City of Santa Monica has a program designed specifically to Capture Urban Runoff with a guide and a worksheet to build the best rainwater capturing system for your site. You will heave learned that drainage gravel takes up considerable space in the ground, perhaps there are better options available?
“Whether you have a gardening green thumb or solar panels on your roof, capturing rainwater at home is the next logical step towards our natural resource independence.”
Our latest article in this series discussed placing a rainwater infiltration basin in an area away from underground utilities, on or near current drainage piping and away from high trafficked areas. With every project it is a good idea to draw up some design plans which we can utilize to properly build our system.
Initial Design
The design for my rainwater infiltration basin is just a large trench, hand dug 2′ wide, 8′ long, 1-2′ deep – as viewed from the middle of the drainage pipe (dependent on how deep that is below the top of the ground). In theory the volume of this space would hold between 120 and 240 gallons of water. I knew I wouldn’t be able to leave it open, as it becomes a safety risk for anyone or thing walking by so it would have to be covered up somehow.
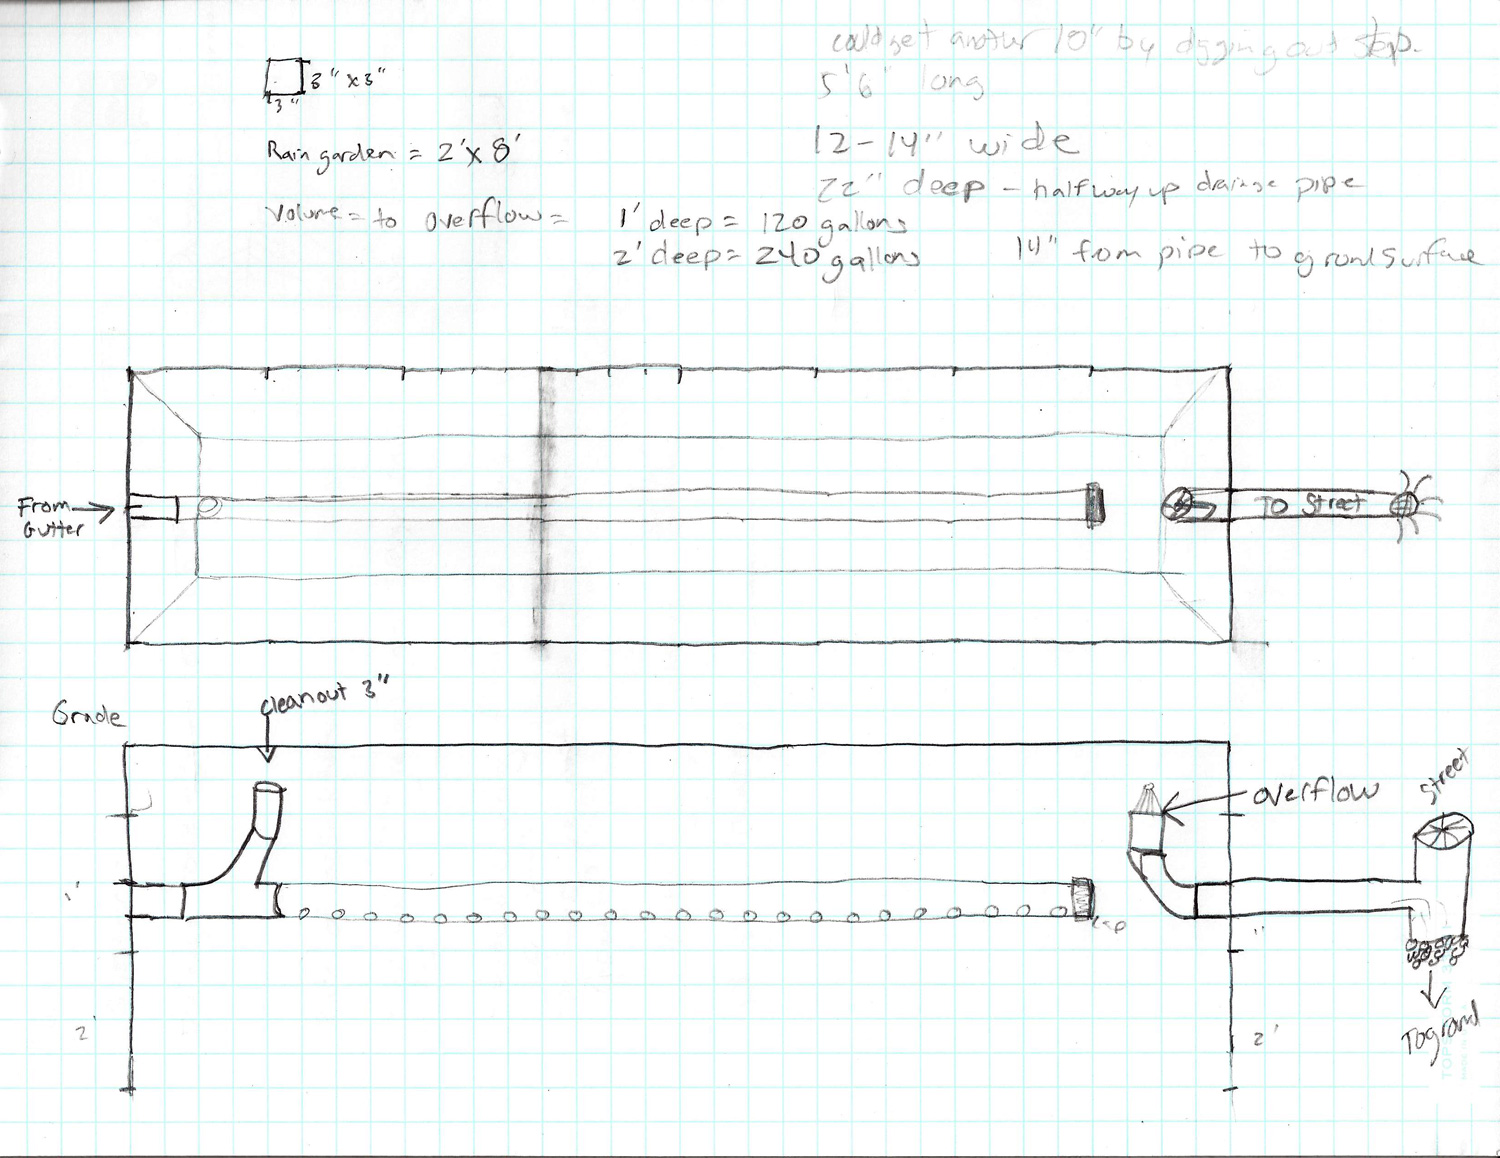
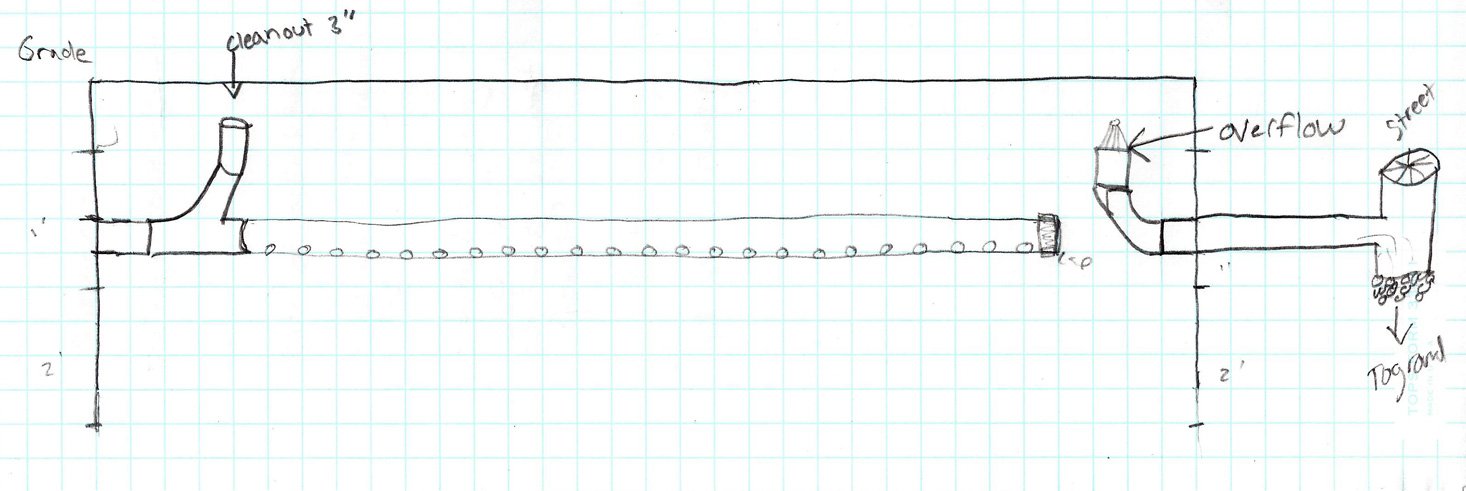
Hand drawn design of rainwater infiltration basin with clean out and overflow.
This design was drawn up without actually measuring anything in the yard. I had assumed I wouldn’t run into any necessary tree roots (like those from my neighbors Liquidambar styraciflua L. aka “Sweet Gum” tree), or any major water pipes (like irrigation lines for my backyard or neighbors side yard). I knew I would position the inlet to the trench at least 10′ from any structural foundation and had more than enough space before I reached the street.
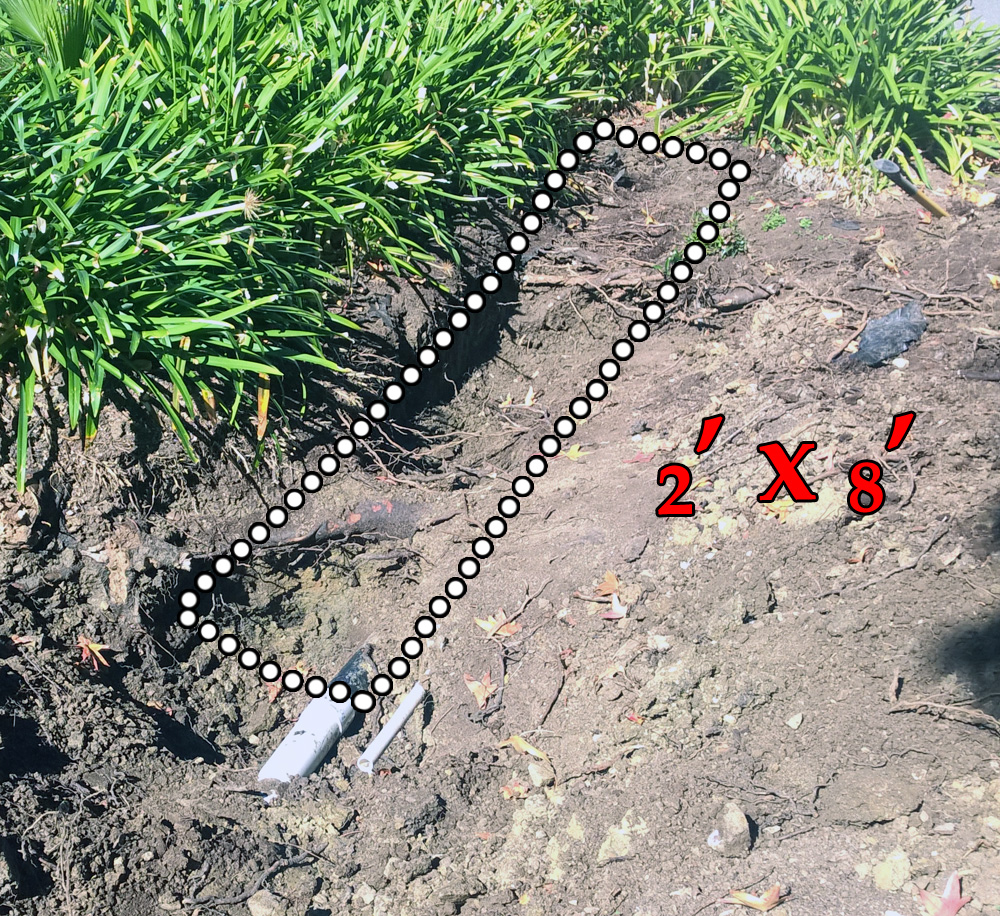
Initial design laid out on ground.
Exploratory Digging
While performing some exploratory digging I learned there was a massive tree root in the middle of my trench which would cause problems. My neighbors also had a irrigation pipe that I had to wary of when I hand dug.
An array of tree roots from various other tree’s both living and not needed to be figured out. We have Texas Privets that are an invasive plant and its roots run everywhere. Luckily, the roots are shallow and rather easy to remove. The removal of this plant is actually part of the driving force behind this project. I figure if I have to dig it up anyways, why not also put in another area to harvest rainwater. 🙂
With the large root discovered, the trench would end up being 5-6′ in length.
Design Review
If you look at the hand drawn design, you’ll notice the drainage pipe from the left has a cap on it. In a perfect world, water would need to drain into the trench, and back up into the system before any water would reach the overflow. The problem here is the water backs up into the downspout and could cause problems with the house foundation upstream.
Design flaw discovered.
To solve this problem, the overflow would be re-attached to the drain pipe and the overflow would move to the street box. This street overflow is how the system was put in in the front yard initially. It was re-built last year and has worked quite well. See the photo collage here.
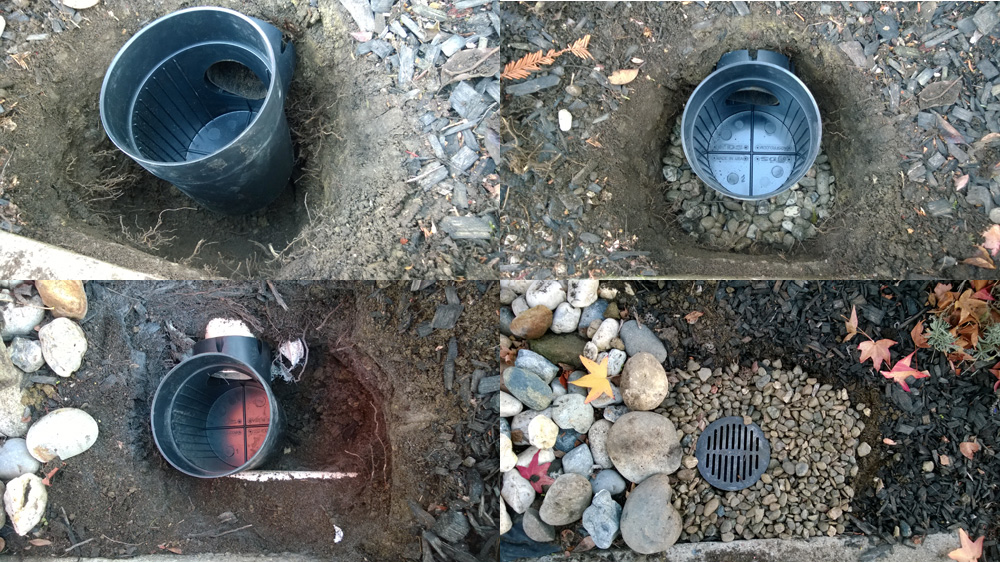
Drainage at sidewalk outlet.
Design Performance
Looking ahead, there were a number of questions this design brought up as well, such as:
- Drainage rock – small or big?
- Rate of Absorption?
- Fill the trough with water (rain or recycled water) and calculate how long it would take to draw down)
- Would wood logs laid vertically in the ground speed up absorption rate? (This is a form of permaculture / hugelkultur)
- Perhaps a post hole digger and bury logs would increase storage capacity.
The take away from the first question showed that drainage rock would take up 66% of the space that I had dug out from the trench, which would also displace anywhere from 80 to 160 gallons of available storage space, leaving me with ~ 40 to 80 gallons of available rainwater storage. I needed a better solution or I would have to dig a bigger trench.
Rate of Absorption shows that I should dig a hole, fill it with water and calculate how long it takes to absorb into the soil. The other example is shown in this video found on Youtube.
Through researching this topic, placing wood chips in the trench around whatever drainage media I chose would help to act as a sponge and would absorb water and also provide nutrients to the ground for plant/tree roots to seek out. Either way, it would help.
There is heavy clay soil under the first foot of top soil which is slow to drain water, but is still drains it. In my small test, the clay absorbed 6 inches of water in 3 days. So if I had 18″ of water, it would take more than a week to drain, if no other water was coming in. That works for me!
Now that I’ve got my design, I need to find a place to put all the dirt I need to remove and start digging.
0 Comments
5 Pingbacks