
Credit: HarvestingRainwater.com
You may have noticed an abundance of rainwater harvesting articles as of late. There is a reason for that. Water that falls from the sky is yours to do with. It would be wise to keep it on your property and put it somewhere that won’t affect the foundation of your house. The best place to put it is in the ground, where plants can utilize its resources later in the year.
The fundamental principles established here are exactly what people have done for centuries.
Rainwater harvesting is not a new concept – even though the CSMonitor would like you to believe it is – it just seems like its the first to be forgotten when a drought ends. Water scarcity affects billions across the globe and we have the education, the man-power and the technology to solve it. We just need the will to make it happen.
Two years ago, I received a book – more like a bible – titled “Rainwater Harvesting For Drylands and Beyond” written by Brad Lancaster. In it, the author visits a ranch in Zimbabwe, Africa which receives about 10″ of rainfall a year. At that ranch, Mr. Zephaniah Phiri Maseko shows Brad the techniques he learned to make rainwater work for him year round. Amazingly, the principals described in this book are still relevant today.
There are 8 principles mentioned in the first chapter which I’ve written about in a few articles on this blog, while I have not referenced them exactly as written in the book, the concepts are still there.
“Begin with Long and Thoughtful Observation”
Credit: HarvestingRainwater.com
The design used in my front yard took a while to put together. By hauling countless loads of recycled water I was able to see how the landscaped worked with vast quantities of water flowing across it. We had a down slope from the house to the street. I watched rains come and go and observed how the landscaped worked with it.
I also learned very quickly that the gutters on the roof clogged with leaves quickly, the drains in the backyard failed to function and the outlets on the curb were plugged as well. We never flooded – to the extent of water entering the house, but we had issues that needed to be dealt with.
The old way of thinking about rainwater is how to get it off the property as quickly as possible. I knew that in order to be successful with rainwater harvesting, I needed to change this approach.
“Start at the Top – or Highpoint – of Your Watershed and Work Your Way Down”
The top of the “watershed” in my case is the roof of my house. This is the same location that this book recommends starting at. My roof has 6 downspouts, 2 of which get the majority of the rainfall. The drain lines for these downspouts run under sidewalks and pathways and are not easily accessible for removal and replacement. My solution was to clear them with a mechanical snake. A drain clearing tool that spins.
From the previous point, we learned how run-off worked on our property and needed to figure out how much water that would be. By using calculations from “How Much Water Does My Lawn Need?“, I was able to determine how much water was on the ground if an inch of rain fell (6,233 gallons). Its a lot of water and that is just our property.
We knew the ground would absorb some of it, but a large portion would try to run to the street. We needed to stop that.
“Start Small and Simple”

5 gallon storage tote holding free water.
My first rainwater harvesting was to put a bucket at the overflow point on the gutter. I quickly learned that a five gallon bin could be full in a matter of seconds from a downspout during a heavy downpour.
These bins were old storage bins I had around the garage. The best part, they were free to me and not in use. A large storage volume at a very low cost. That is exactly what “Small and Simple” strives for.
What this allowed me to do is test to see how varying containers held up to rainwater collection. I quickly learned these storage bins were not practical. This is why I moved on to “Build a Better Rainbarrel” and used inexpensive recycling bins from Home Depot. They were the cheapest bin with the most volume, so I picked up two. I also used electrical conduit parts I had at the house that I wasn’t using.
The point I’m making and as quoted in the book “don’t start by creating an expensive and elaborate system that might not be right for your landscape, lifestyle and means.”
“Spread and Infiltrate the Flow of Water”

Drawing showing side view
In short – slow down the flow of water and give it a means to percolate into the soil. At our house we changed the contour of the land so that water could pool on the surface and percolate into the ground. You can read about that project here: “Front Yard Re-Landscaping.”
Infiltrating the flow of water enables us to re-charge the water table around our homes, which will help our plants during the summer and may help the community if someone has a well.
Another example of slowing the flow of water and reducing ponding was made evident by “Percolation Basins at the Ruth Bancroft Garden“. As you can see in the graphics, water will pool on the surface of the ground with very limited percolation into the soil. By digging a hole and surrounding it with gravel, you can give rainwater the chance to get below compacted earth and let it infiltrate naturally to the water table.
“Always Plan for an Overflow Route, and Manage That Overflow Water as Resource”

Swale
“Thinking of Re-Landscaping – Consider a Swale” was my introduction for you into swales. I designed mine to come with a passive overflow device. That is to say, when the water had filled the swale, excess water could flow the street. The ground will only absorb so much and you always need to provide a place for it to go. Worst case scenario is it floods into your house.
The passive overflow works like this – when the volume of water leading to the swale is too much for the ground to absorb, an outlet pipe system position about 4″ above the swale drain pipe allows it to automatically overflow down the drain line separating my house from my neighbors. This enable the swale to always be full and only excess water goes to the overflow.
This summer, we plan to build another swale on that overflow so that the excess water gets one more chance to infiltrate into the soil before it exits at the curb. This second swale will also be in a small depression between our property and that of our neighbors and its where quite a few plants and trees have spread their roots.
Another example along this principal is “Capturing Rainwater for Landscape Plantings“, where a more active participation is required because gate valves are used to direct flow around the buried system of pipes.
“Maximize Living and Organic Groundcover”
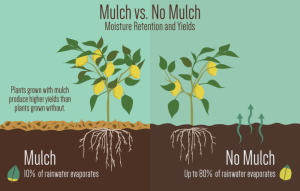 This principal stresses the use of mulch around the property. We determined last May that the use of mulch creates an 80% water savings from evaporation. “Thinking of Re-Landscaping – Consider Using Mulch” – as written in the book, water will flow across bare dirt but when organic material is on the surface, water will slow down and absorb into mulch.
In my neighborhood, I see too many neighbors with zero mulch on the ground, but blown clear surfaces of exposed soil and no chance for water to absorb into the ground. Maybe this is a look that people want at home, I find it atrocious. In order to create a habitat for plants to grow, organic material needs to be in the ground. What better place to add it back but to let plants and trees drop their leaves and let them decompose into mulch.
“Maximize Beneficial Relationships and Efficiency by ‘Stacking Functions'”
To stack a function creates dual purposes for our actions. For example, if we create a swale, plant crops that could benefit from its water source – like vegetables or fruit trees. Or let excess water flow into a pond – and then stock that pond with fish that you eat.
“Continually Reassess Your System: The ‘Feedback Loop'”
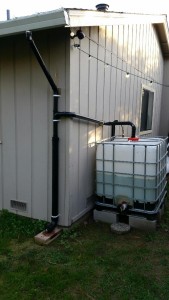
Gutter to 275 gallon IBC tote.
Observe the things you have done and come up with better solutions to achieve the same results. When it rains, I watch the gutters and learn how they react. I go and check my overflow lines and see if they’re being used. I check my rain barrels for proper operation. Most of all, I make sure I am not flooding on property and if so, figure out ways to solve it.
After the rains, I am given a chance to check the property. We just went through a “long” dry spell for a winter month – February was the hottest month on record. As I walk around the front yard, the ground is loose, but no soggy. If I brush the wood chips aside and stick my finger in the soil I find that it is moist, no need to run the irrigation system. I will use the same moisture checking technique this summer to determine when I need to haul recycled water and irrigate my yard.
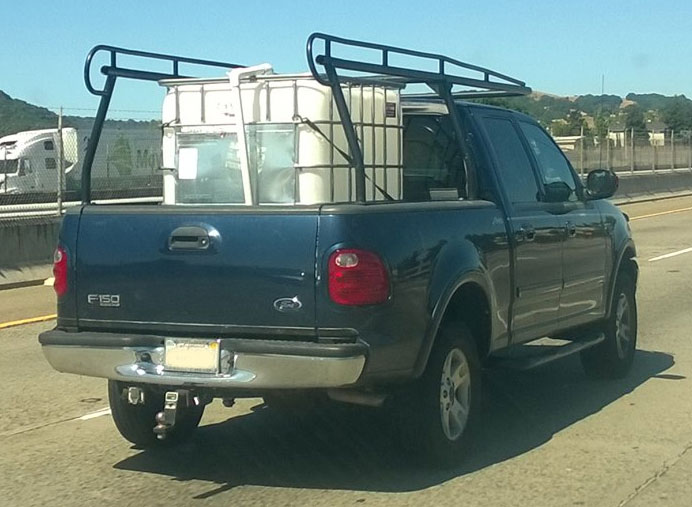
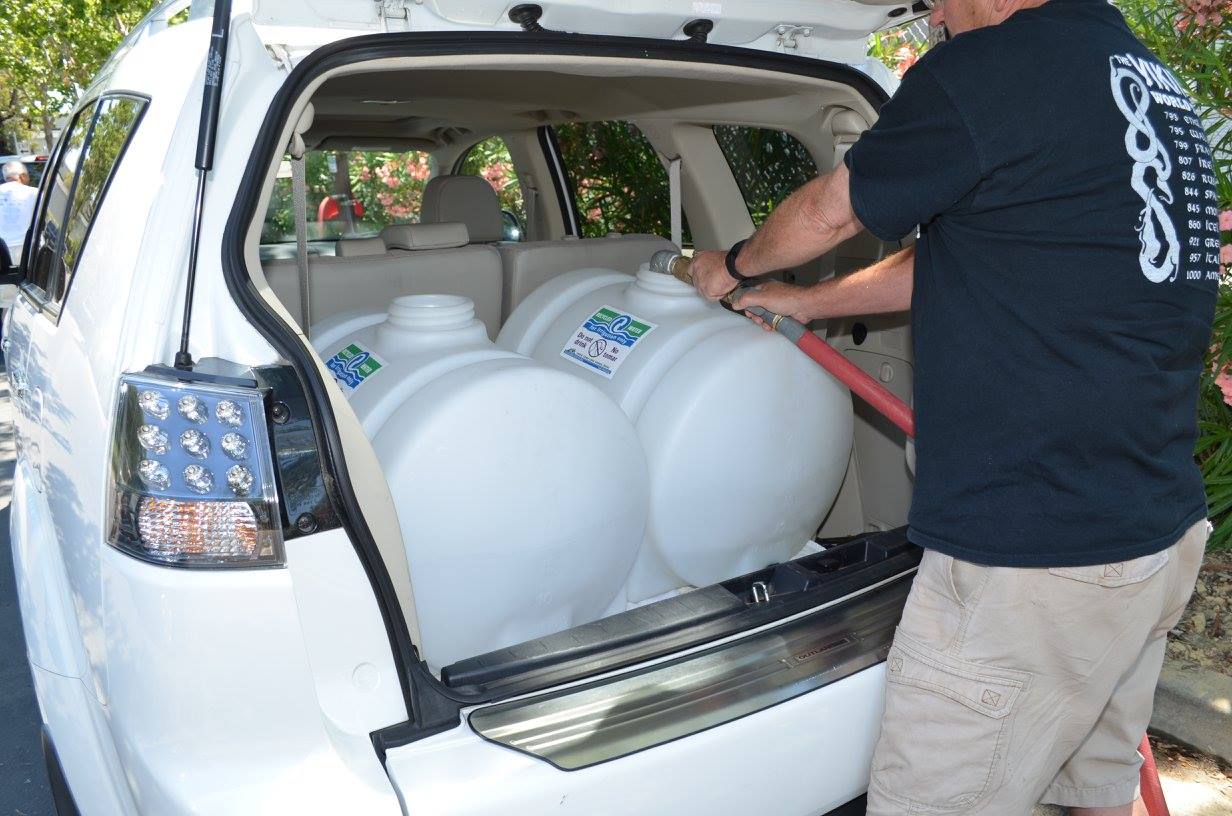
As a recycled water blog, utilizing these techniques will save you wear and tear on your vehicle this summer as you won’t need to haul recycled water until later in the year, compared to your neighbors that just plumb their rainwater straight to the curb. Let rainwater work for you – if anything, use your recycled water hauling container as your rainbarrel in the off-season.
Take these eight principals and apply them to your house. If anything, pick up the book to keep as your own copy, it is a great reference guide.
Tell me in the comments about things you’ve done with rainwater harvesting at home.
0 Comments
1 Pingback