 I am a homeowner with a hot water heater. I also living in a water service area with dissolved solids in the water supply. Combine the two in a hot water vessel and something happens. The dissolved solids drop out of suspension and form a coating on the bottom of the heater. Unfortunately, this also reduces the efficiency of the heat transfer from burning natural gas into heating water for showers or laundry.
But did you know, using the tools you probably already have at home, you can flush this crud out of your hot water heater, water the plants in your yard and increase efficiency and the life span of your hot water heater? I’m going to show you how.
First off, you don’t need to be a plumber to flush your own hot water heater. You mostly just need to know about “righty-tighty and lefty-loosey”. Seriously.
I’m a certified high pressure steam boiler operator and in our training, we learned that a steam boiler should be blown down a couple of times a day to remove the sediment that accumulates on the bottom of the boiler. The principals learned in that boiler class can be brought home. The hot water heater in your house is very similar to a low pressure boiler. So while you probably don’t need to blow your water heater down 3 times a day (as it may not be running at 100% output 24/7), you should setup a preventative maintenance schedule on it every 6-12 months.
When we bought our house, our hot water heater would make “popping” noises when heating water. It was loud. A quick search online said to fix it I would need to flush out the heater. Now, every 6 months I flush the heater. No more popping, lowered gas usage and water gets hot quickly. A win-win all around.
This project will take about an hour to complete.
Tools needed:
- Garden hose
- Step stool/ladder
- Adjustable wrench or crescent wrench
- Match or “Aim-n-flame” for re-lighting pilot light
- Phillips head screw driver
Procedure:
First things first. If you will be disposing of the water on your lawn or garden, the water needs to cool. The best way to do this quickly is to have someone take a shower or bath. When they’re done using the hot water and before the hot water heater turns on to re-heat the water in the tank, turn the hot water heater off.
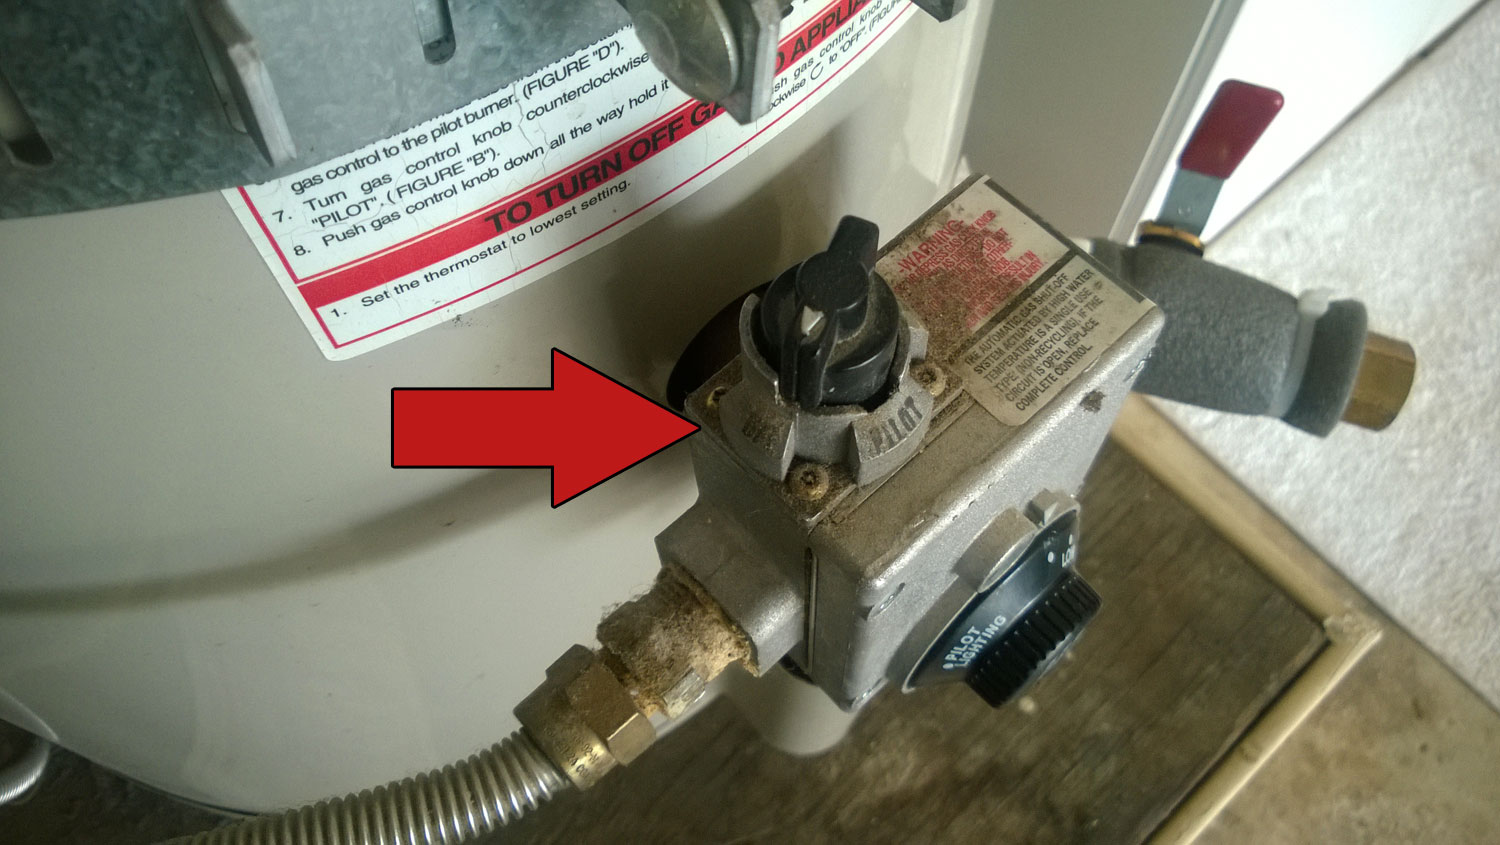
Turn hot water heater to off position.
Do this by turning the knob from On to pilot (may have to push down on knob – read the directions of the side of the hot water heater or look in owners manual) and then flip to “off”. You can also lower the thermostat below “low”.
The second step is to find water inlet valve on the top of the hot water heater. This is from the supply line on your house – the cold water inlet. Ours has a isolation valve (gate valve). Close the valve.
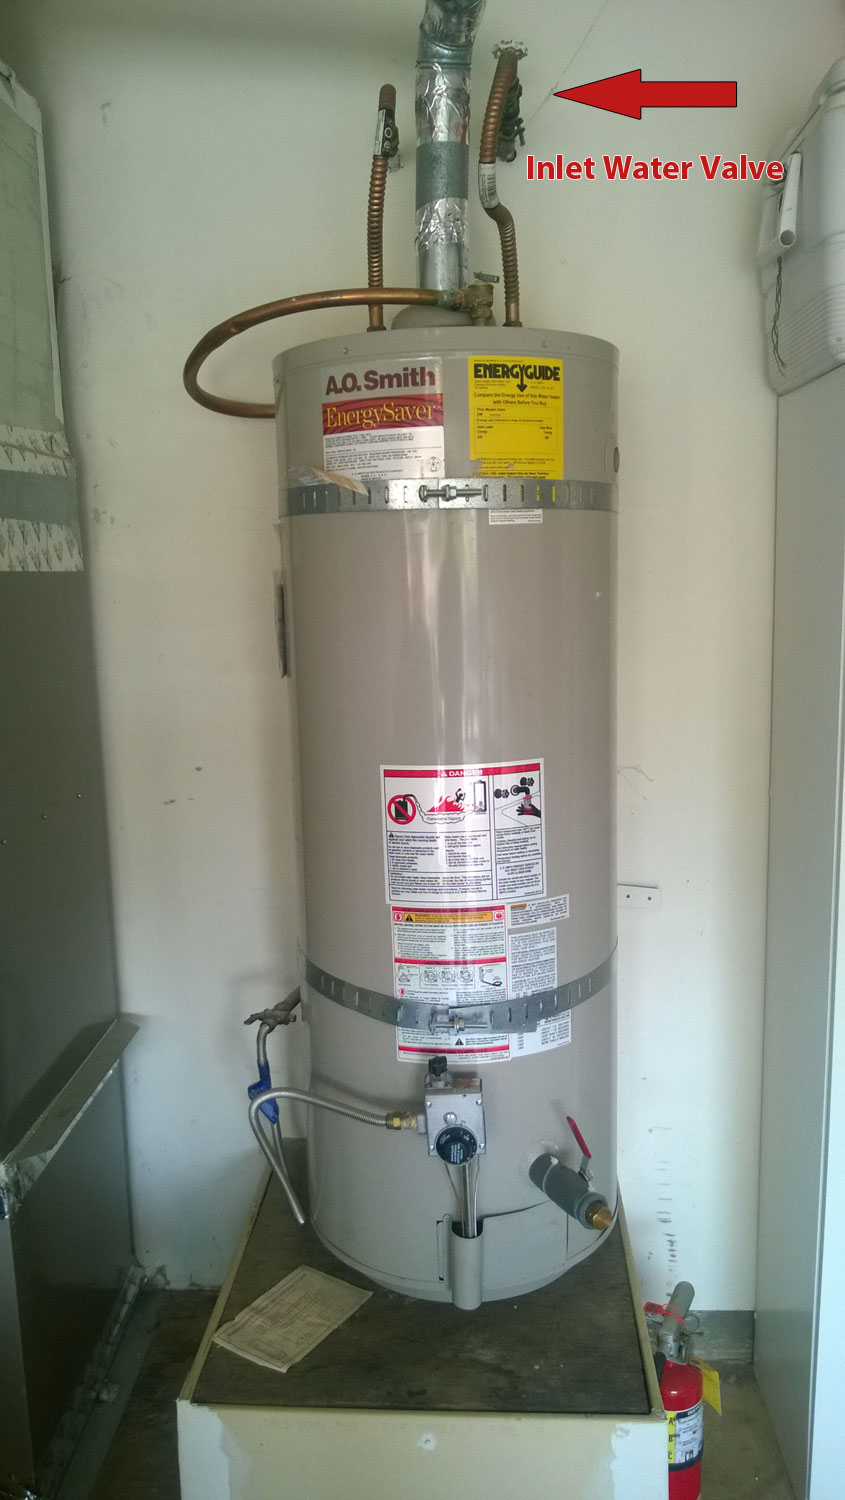
Close inlet water valve.
This doesn’t let any more water keep the tank pressurized.
Now go to every sink in your house and turn all the hot water faucets to full blast. Water may initially come out and then slow to a trickle. This is normal. This is also a good time to tell anyone in your house that hot water is unavailable until this project is done.

Open sink faucets to hot water side.
This will help the hot water lines drain back to the hot water tank in the house. During the process you may hear and feel air being pulled into the water lines in your house. This is expected.
Back at your hot water heater, find your drain valve and remove the cap if there is one.
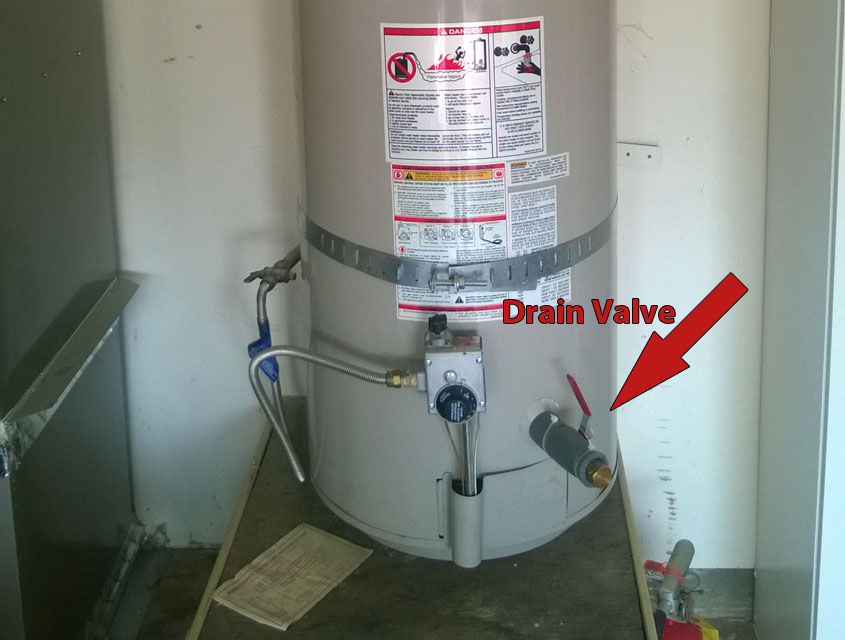 Find the drain valve. |
 Remove cap from drain valve (optional). |
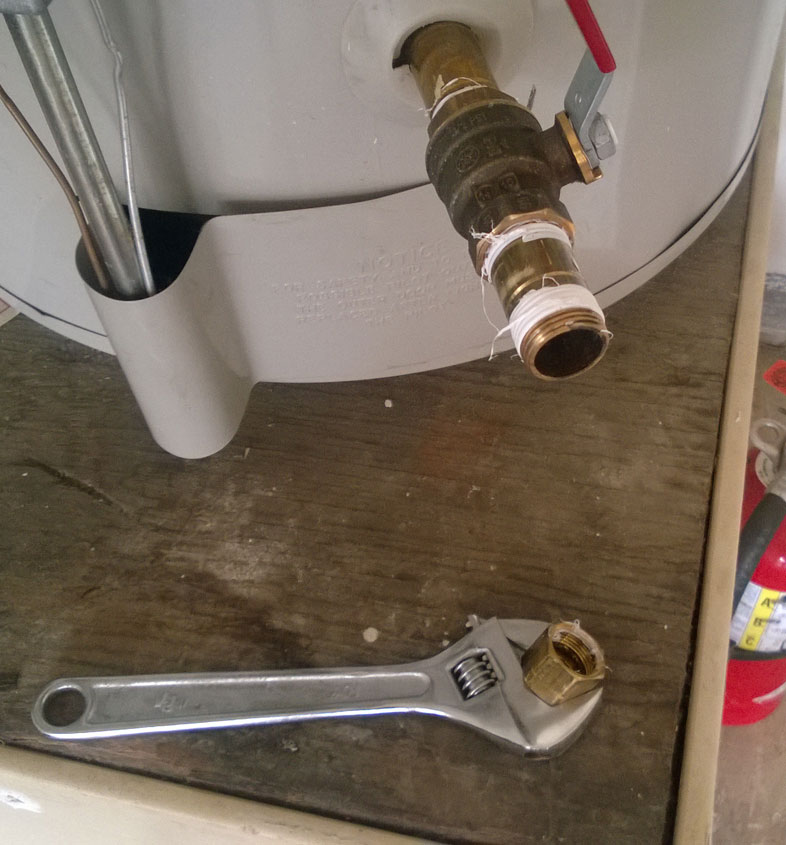
I used to have a plastic drain, but learned after the first time I did this project that once the seal is broken on those plastic drain valves, they don’t hold water very well. I replaced mine with brass fittings, caps and ball valves. If this part is not comfortable for you to do, you could call a plumber and spend some money, or when your tank is empty, bring the plastic drain valve to Ace Hardware and get a metal replacement. Either way, lets move on.
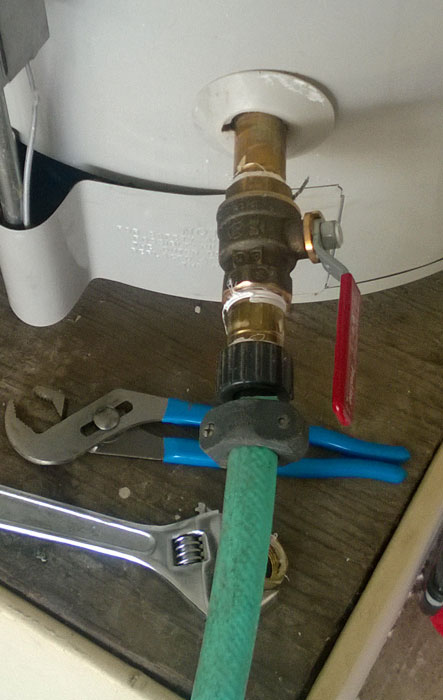
Take your garden hose and attach the female end to the drain valve.
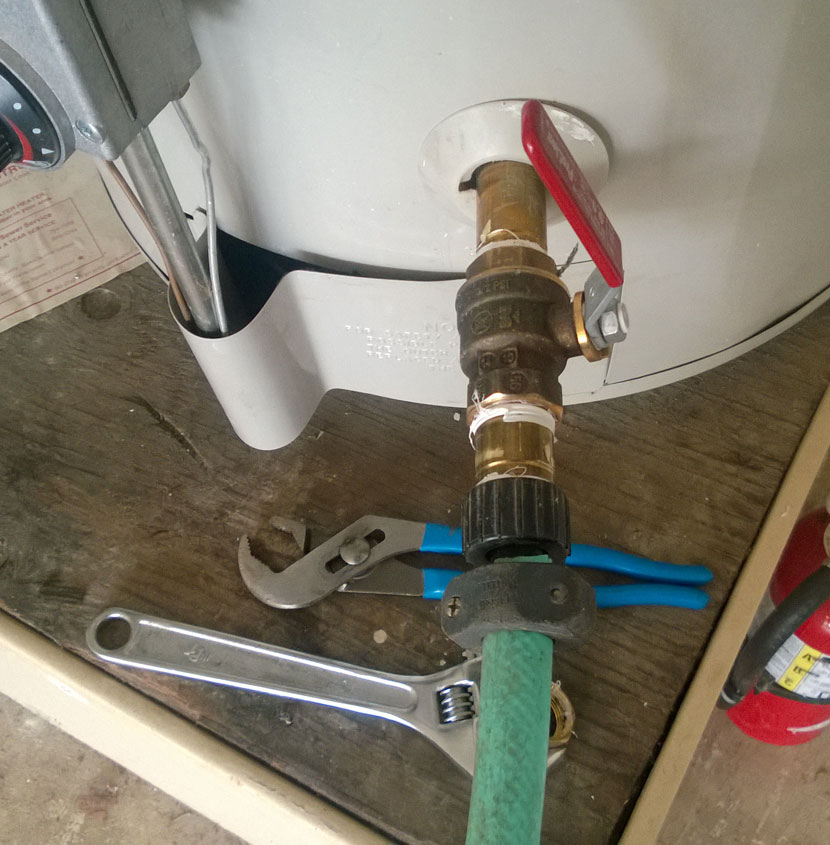
Attach garden hose to drain valve.
Run the other side of the garden hose to the garden or lawn. You’ll be using the water from your tank to water the yard. This is how we’re recycling the water. Of course you could always waste the water you’ve already paid for and put it right down the drain. To each their own.
Go back to your hot water heater and open the drain valve. This should enable water to start flowing out the hose, if the outlet is lower than your water tank.
Open drain valve.
My front yard is lower than the tank so it flowed pretty easily. If your tank is in a basement, you may need to setup a sump pump system or the like, but that is something you’ll need to figure out.
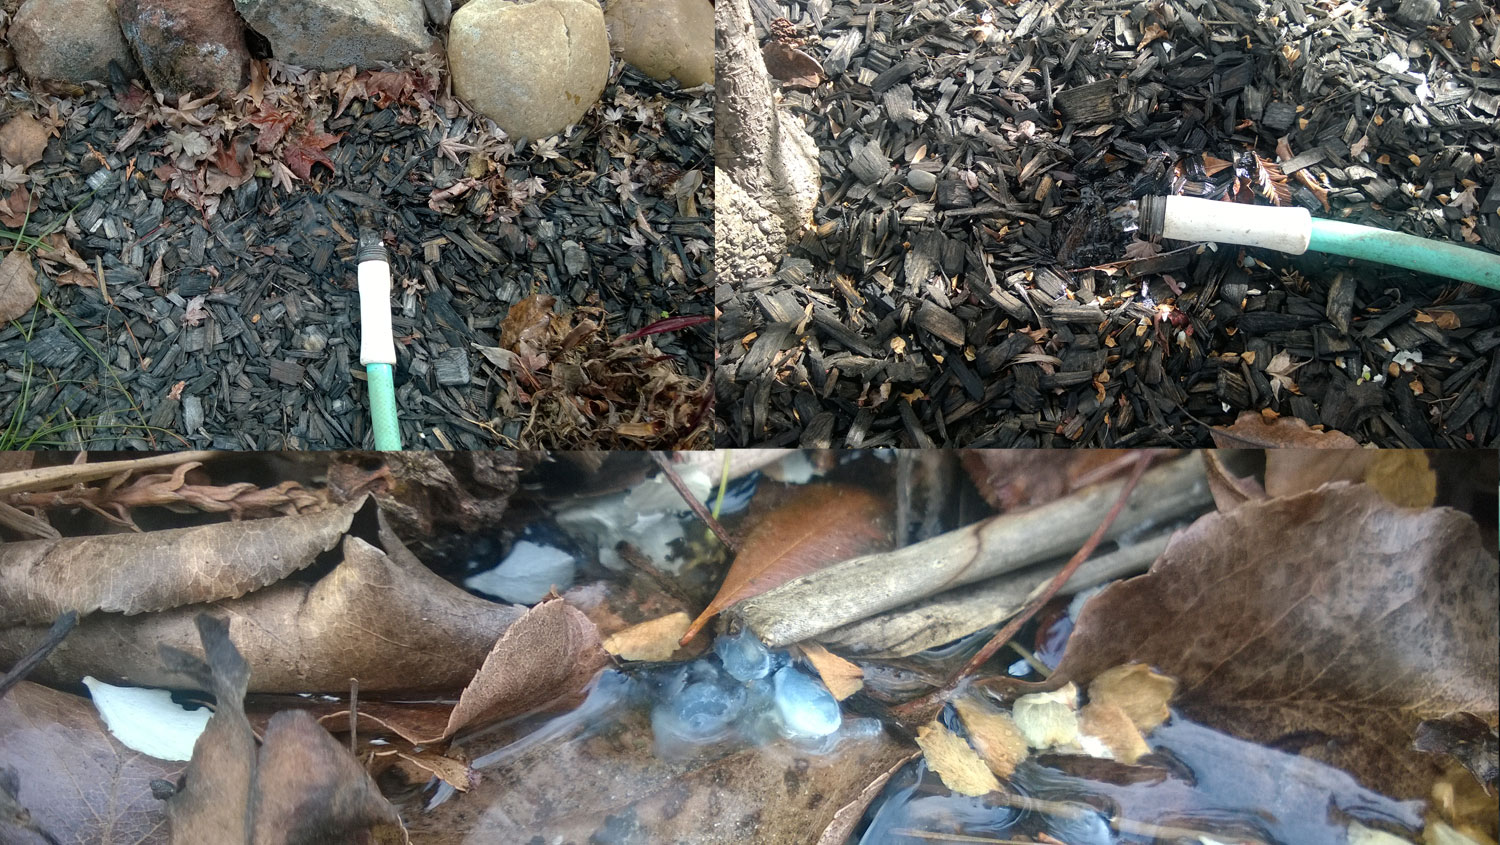
Drain the water onto your property.
Water will begin to flow out. If it pools too much in one area, move the hose around. I moved the hose about 6 times with this process. The initial tank drain will take about 20 minutes. You will hear a gurgling sound as the water is drawn from the tank. You can go listen to air being pulled in to your open faucets too if you’d like.
When water slows to a trickle, go back to your hot water tank and open the inlet water valve for about 5 seconds and then close it again. This will cause agitation in the tank and will work to break up the sediment on the bottom of the tank. Go back and look at the water and crud coming out of the hose.

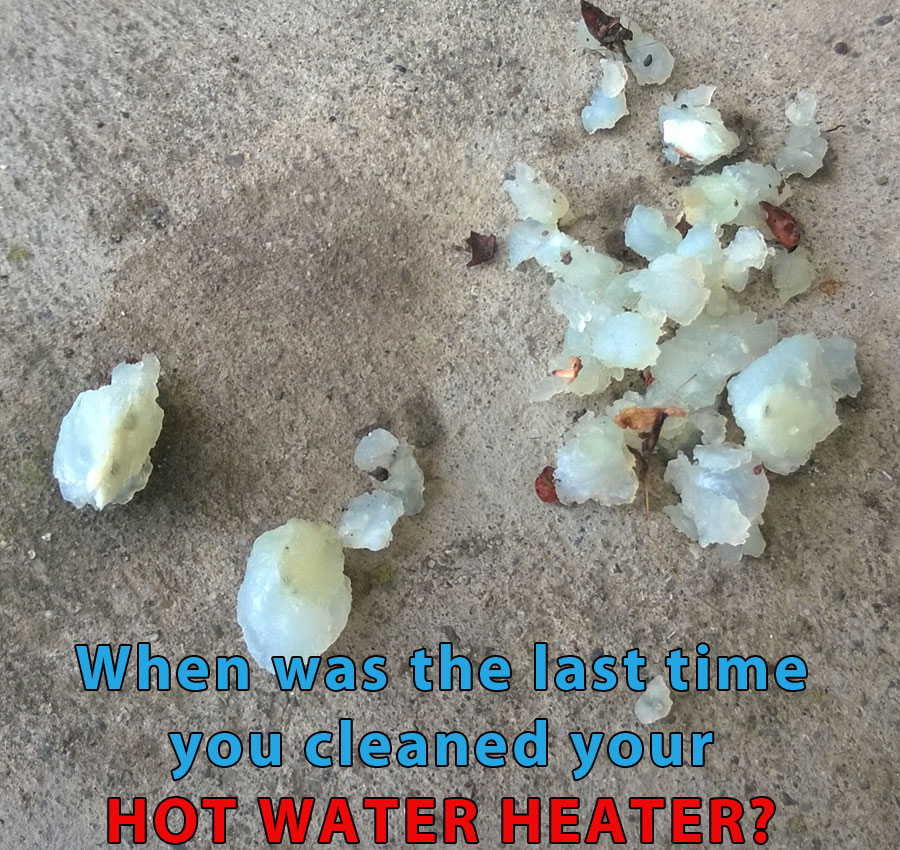
White crud from the hot water tank.
Repeat this step about 15-20 times to ensure you get all the crud out.
Each time you open the valve, you’ll let in about half a gallon of water. By the end of this process you’ll have used about 10-15 gallons of water. Below are are some photos of the crud that came out during this process.
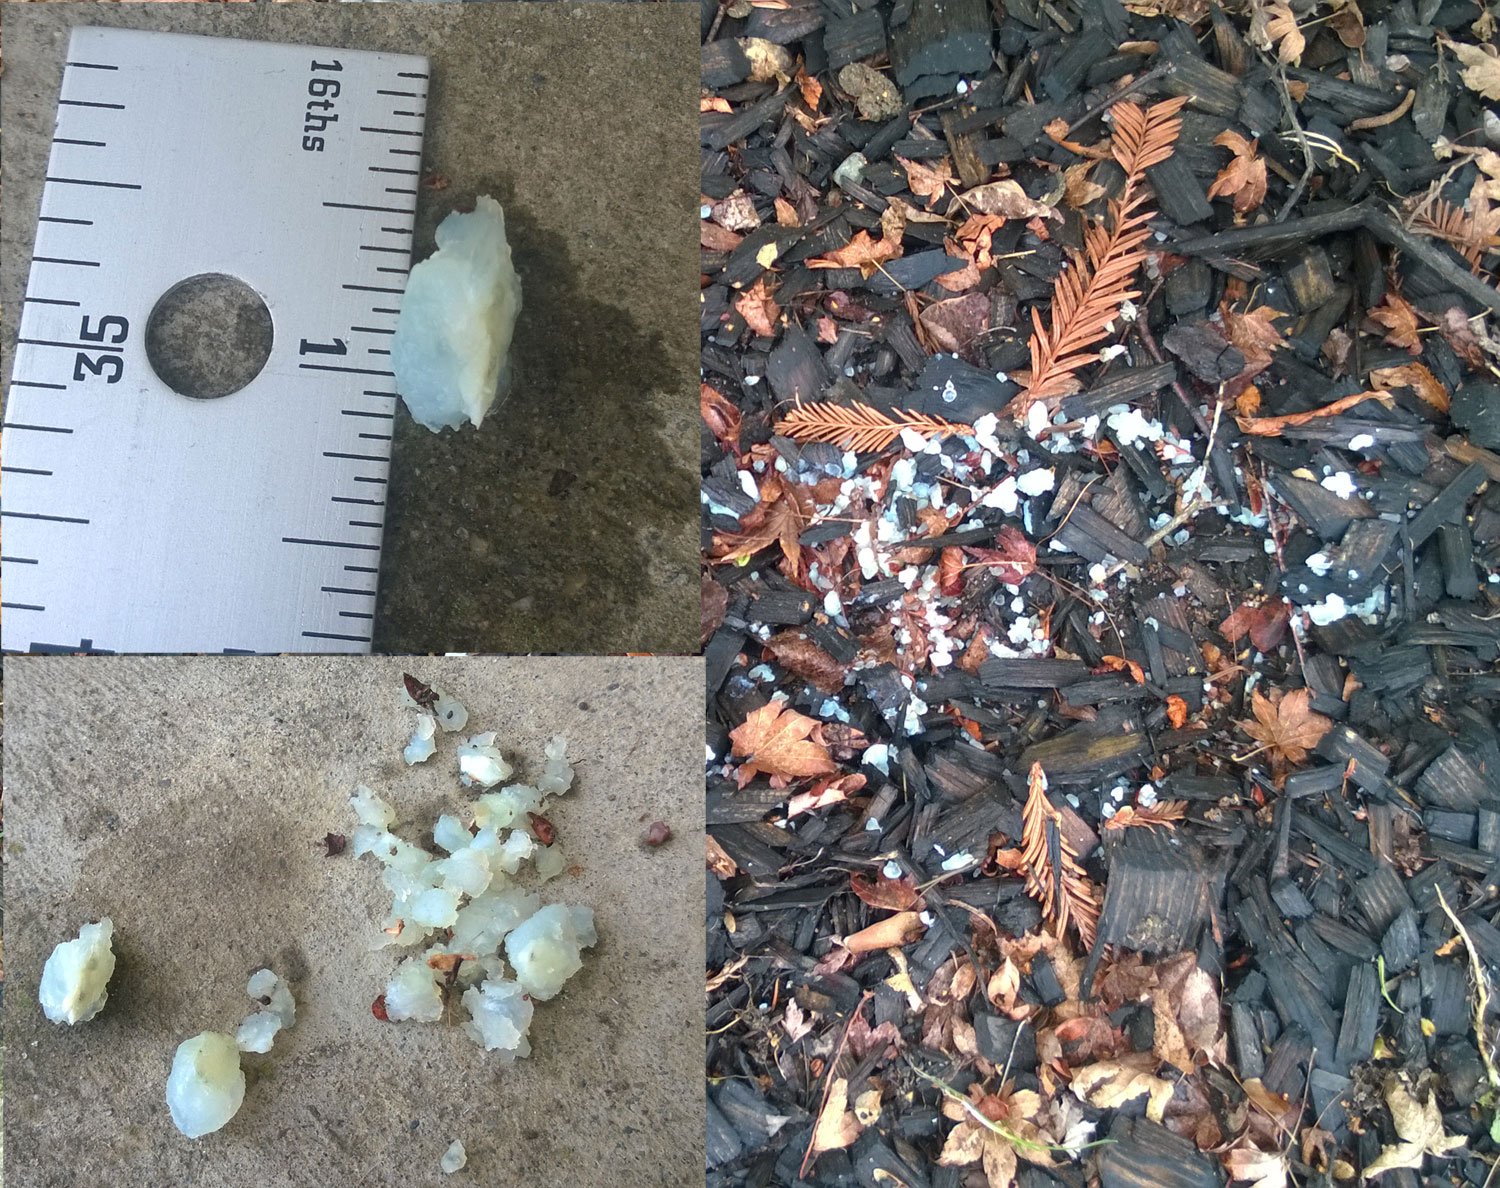
Getting the crud out.
Eventually you’ll notice there is no more crud coming out of the hose.
Go back to your hot water and close the drain valve and remove the hose. In my case, since I have all brass fittings, I also wrap it in foam pipe insulation to keep it warm. Pipe dope is added the threads for a water tight seal if the drain valve were to be accidentally opened.
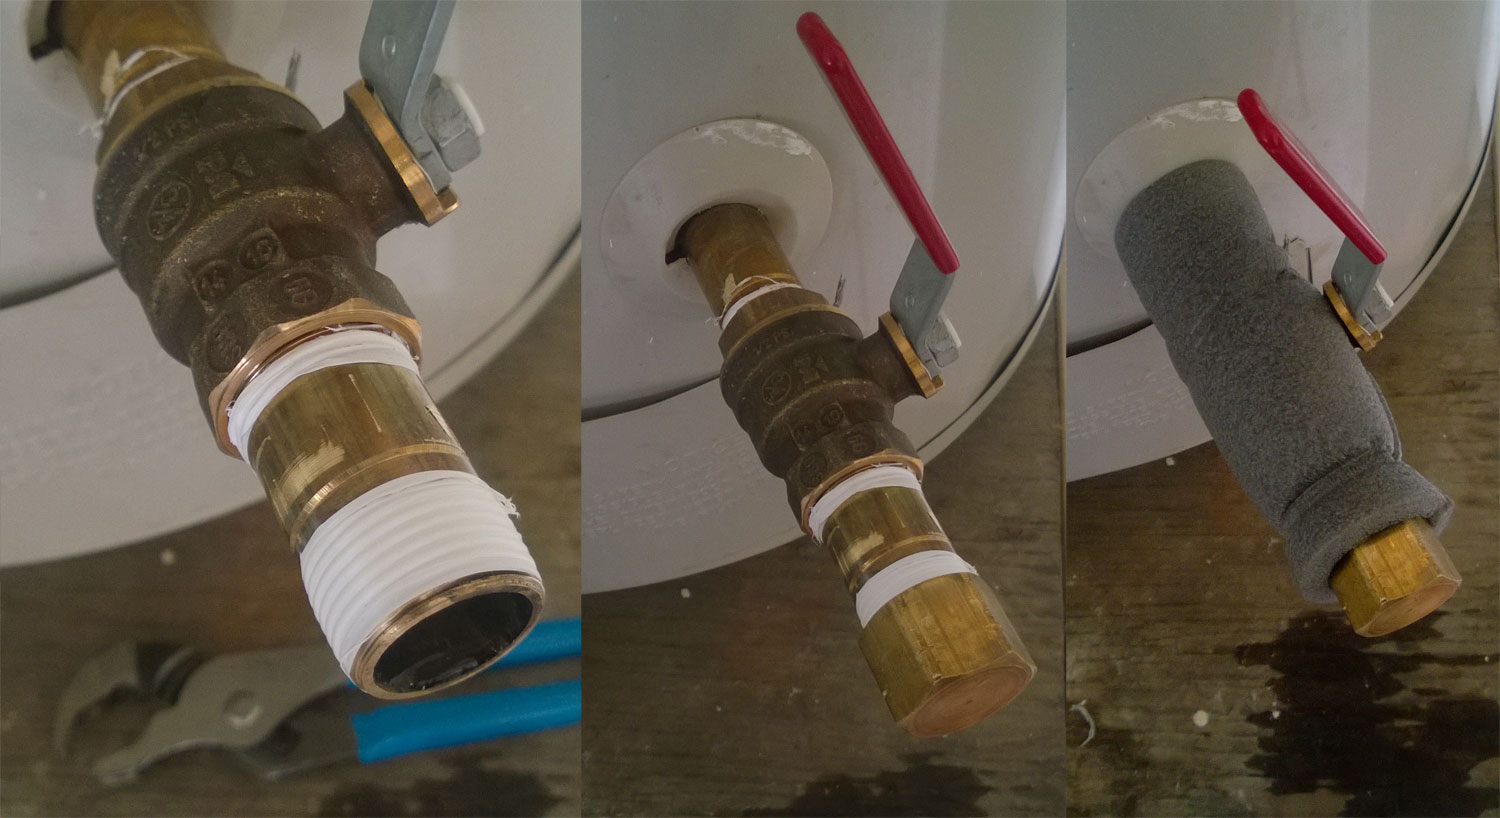
Close drain, remove garden hose, replace cap (if applicable).
Now open the inlet water valve full open. When you can no longer open it anymore, back off on the valve by turning it clockwise about a 1/4 turn. This will make it easier to close the valve in the future. You will hear the water fill up the tank. Depending on your water pressure at your house and the size of the tank, this should take about 3 minutes to re-fill.
This would be a good time to go inside and check those faucets you opened. You’ll hear them pushing air out. Once all the air is removed from the lines, they will start flowing normally again. You can turn off the faucets now.
When the tank is full you won’t hear anymore water going into it. Plus if all the hot water faucets are off, the water system in your house will be pressurized. Now is the time to re-light the pilot on your water heater.
The directions to do this are on the side of the heater, mine is behind the earthquake strapping.
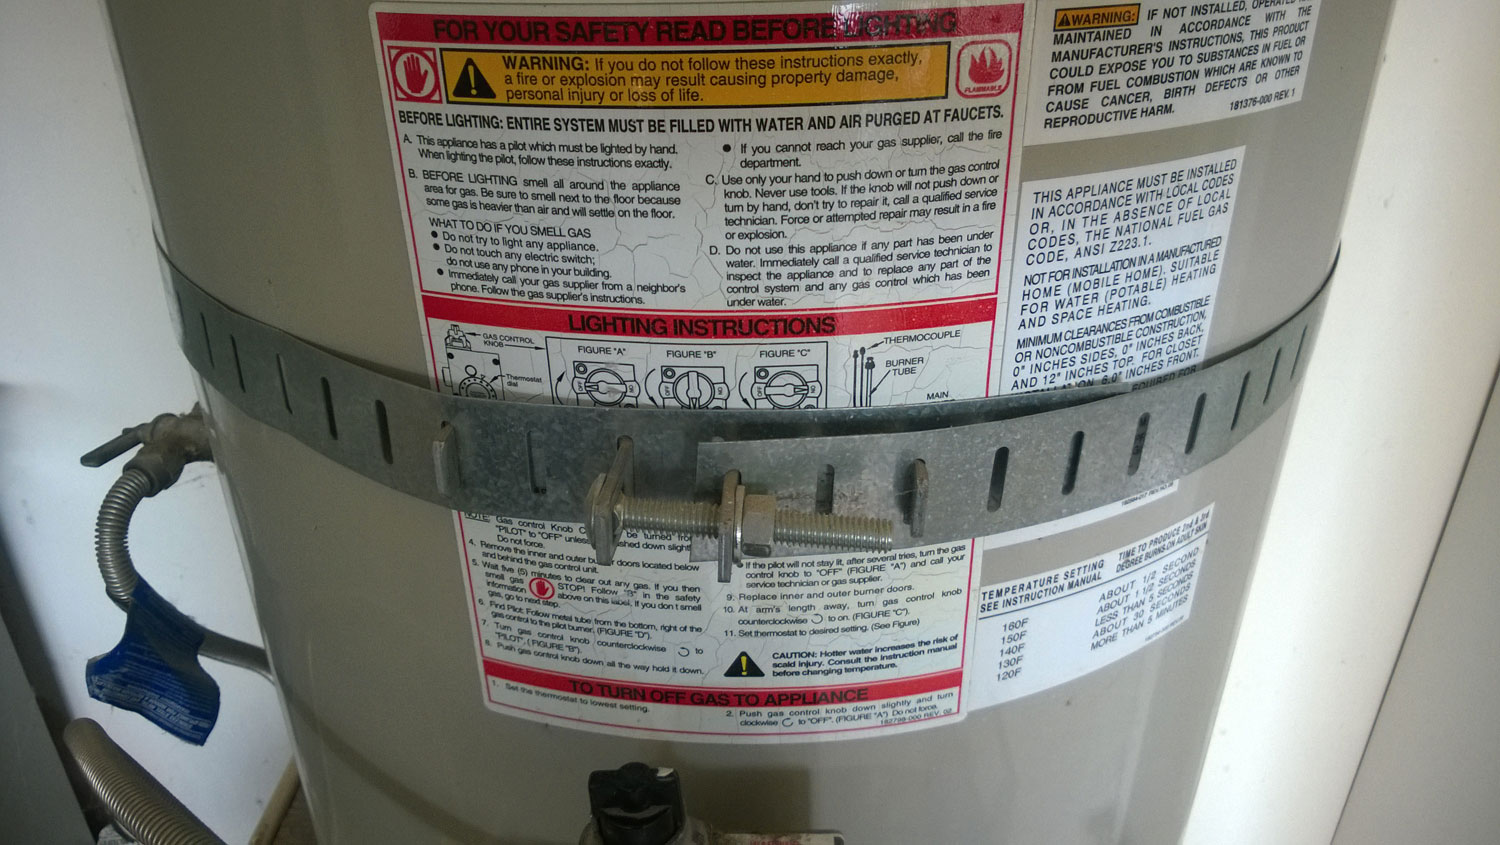
Directions to re-light pilot light.
If you don’t feel comfortable performing this procedure, you can always call your local gas provider and have them light it. Read the directions and follow them, this is easy to do.
- Remove the two covers from the water heater leading to the burner chamber. (Look at the pictures on the directions if you need help).
- Find the pilot burner.
- Light a match or “aim-n-flame” and press the gas knob down at the pilot setting.
- Wait about a minute to light the flame (you may need to repeat step a few times).
- Release the pilot knob when flame is lit.
- Change gas knob to the “ON” position and replace the covers.
- Now turn the thermostat to your desired water temperature setting. You’ll hear the burner start-up, just like normal.
If you smell natural gas at anytime, stop what you’re doing, turn off the gas and call a professional. I can not be held responsible for mistakes you make while re-lighting your water heater.
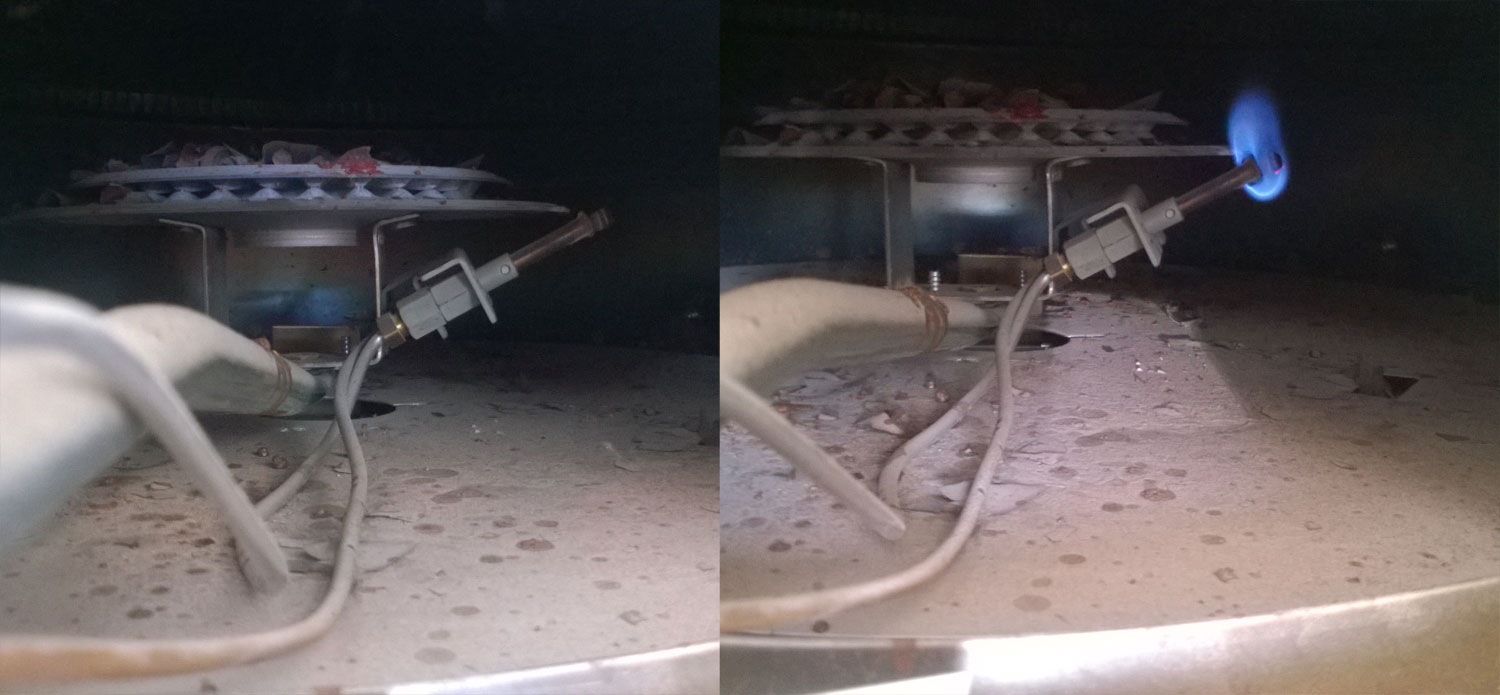
Re-light pilot for burner.
Just put all the covers back in place, return all the tools you used and be happy knowing that you’ve successfully flushed out your hot water heater. Your work will make it more energy efficient, extend its useful service life and reduce its gas usage. You would be smart to come back and repeat this process every 6-8 months to keep your hot water heater running in tip-top shape.
That’s all there is to it.
Leave a Reply