
Facebook.com/RecycledH2O
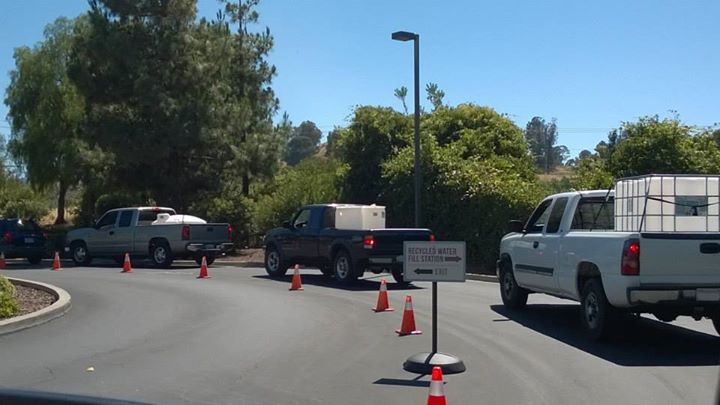
There has been immense activity surrounding hauling recycled water. The lines at recycled water fill stations are long (with more hose bibs/fill stations coming online often), everywhere you look in the are people are driving around with 300 gallon totes in their trucks and/or trailers and demand for pumps at Harbor Freight is high.
So why not take this as a chance to update you on the changes I’ve made with my recycled water hauling setup and share some of the Tips & Tricks I have learned.
11,500 gallons Recycled Water Hauled
As of today, I have hauled 11,500 gallons of recycled water in my 150 gallon Aqua Tank II that I picked up a year ago from Baytec Containers.
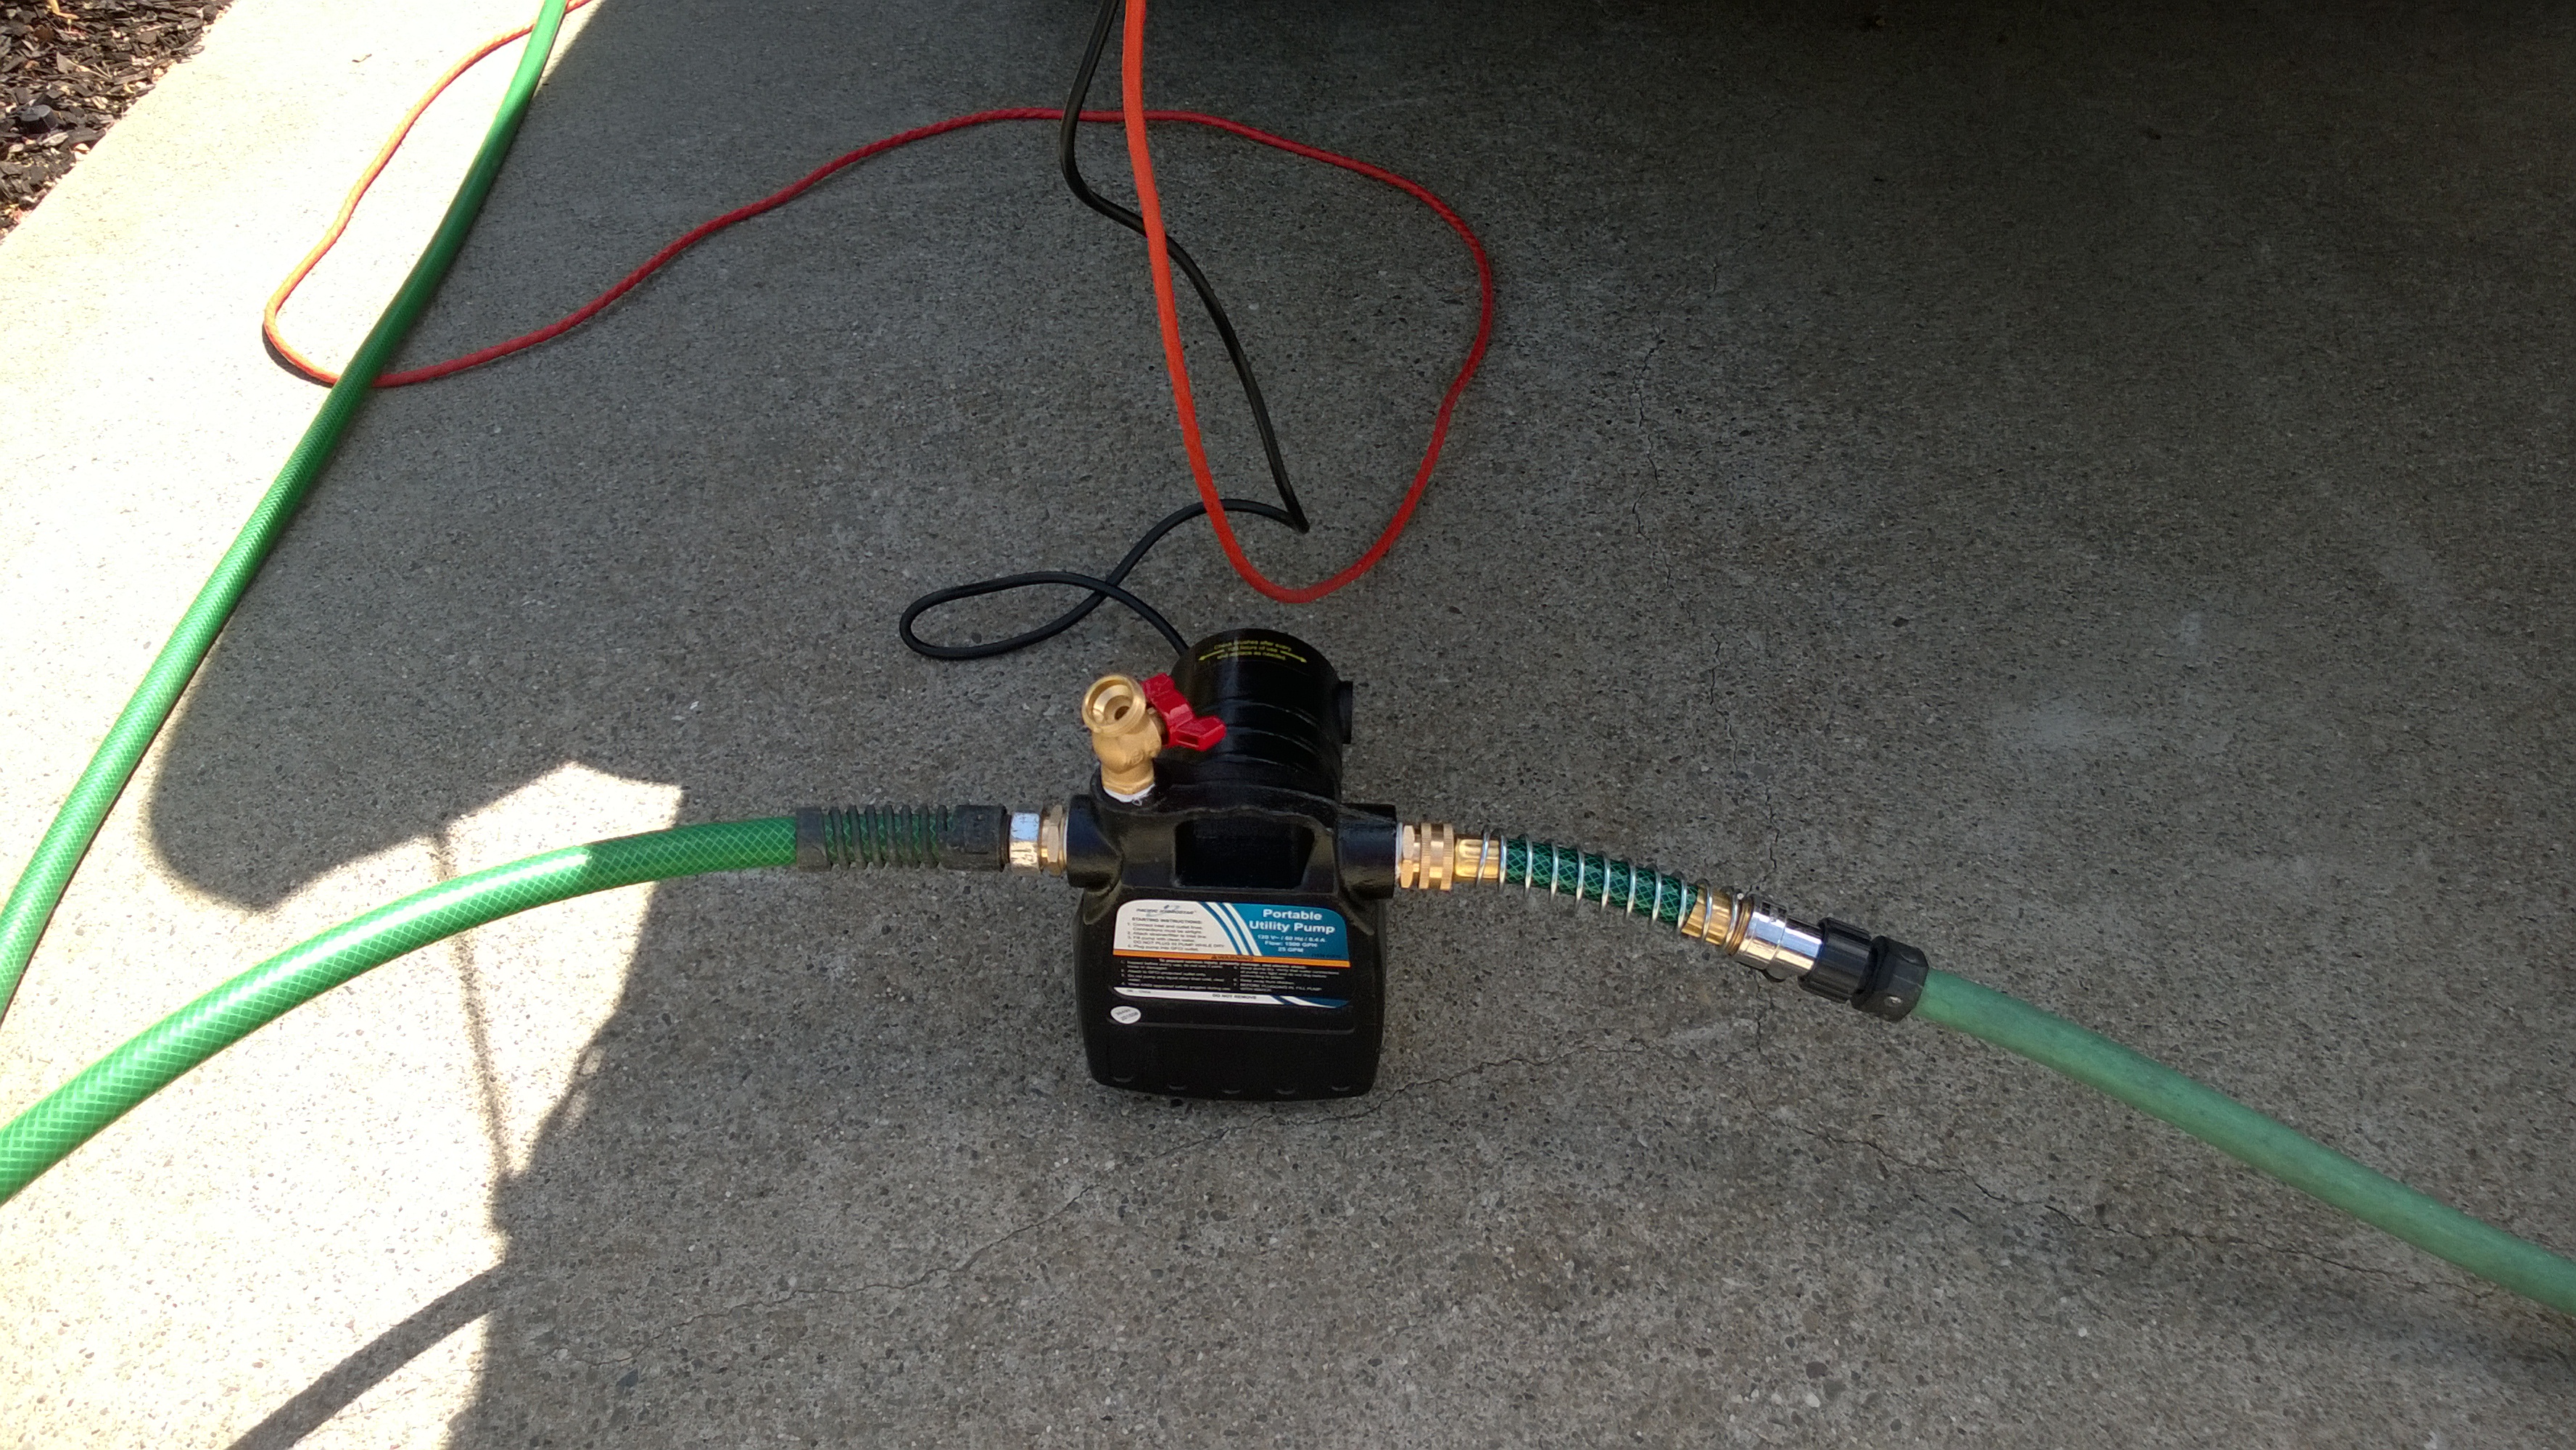
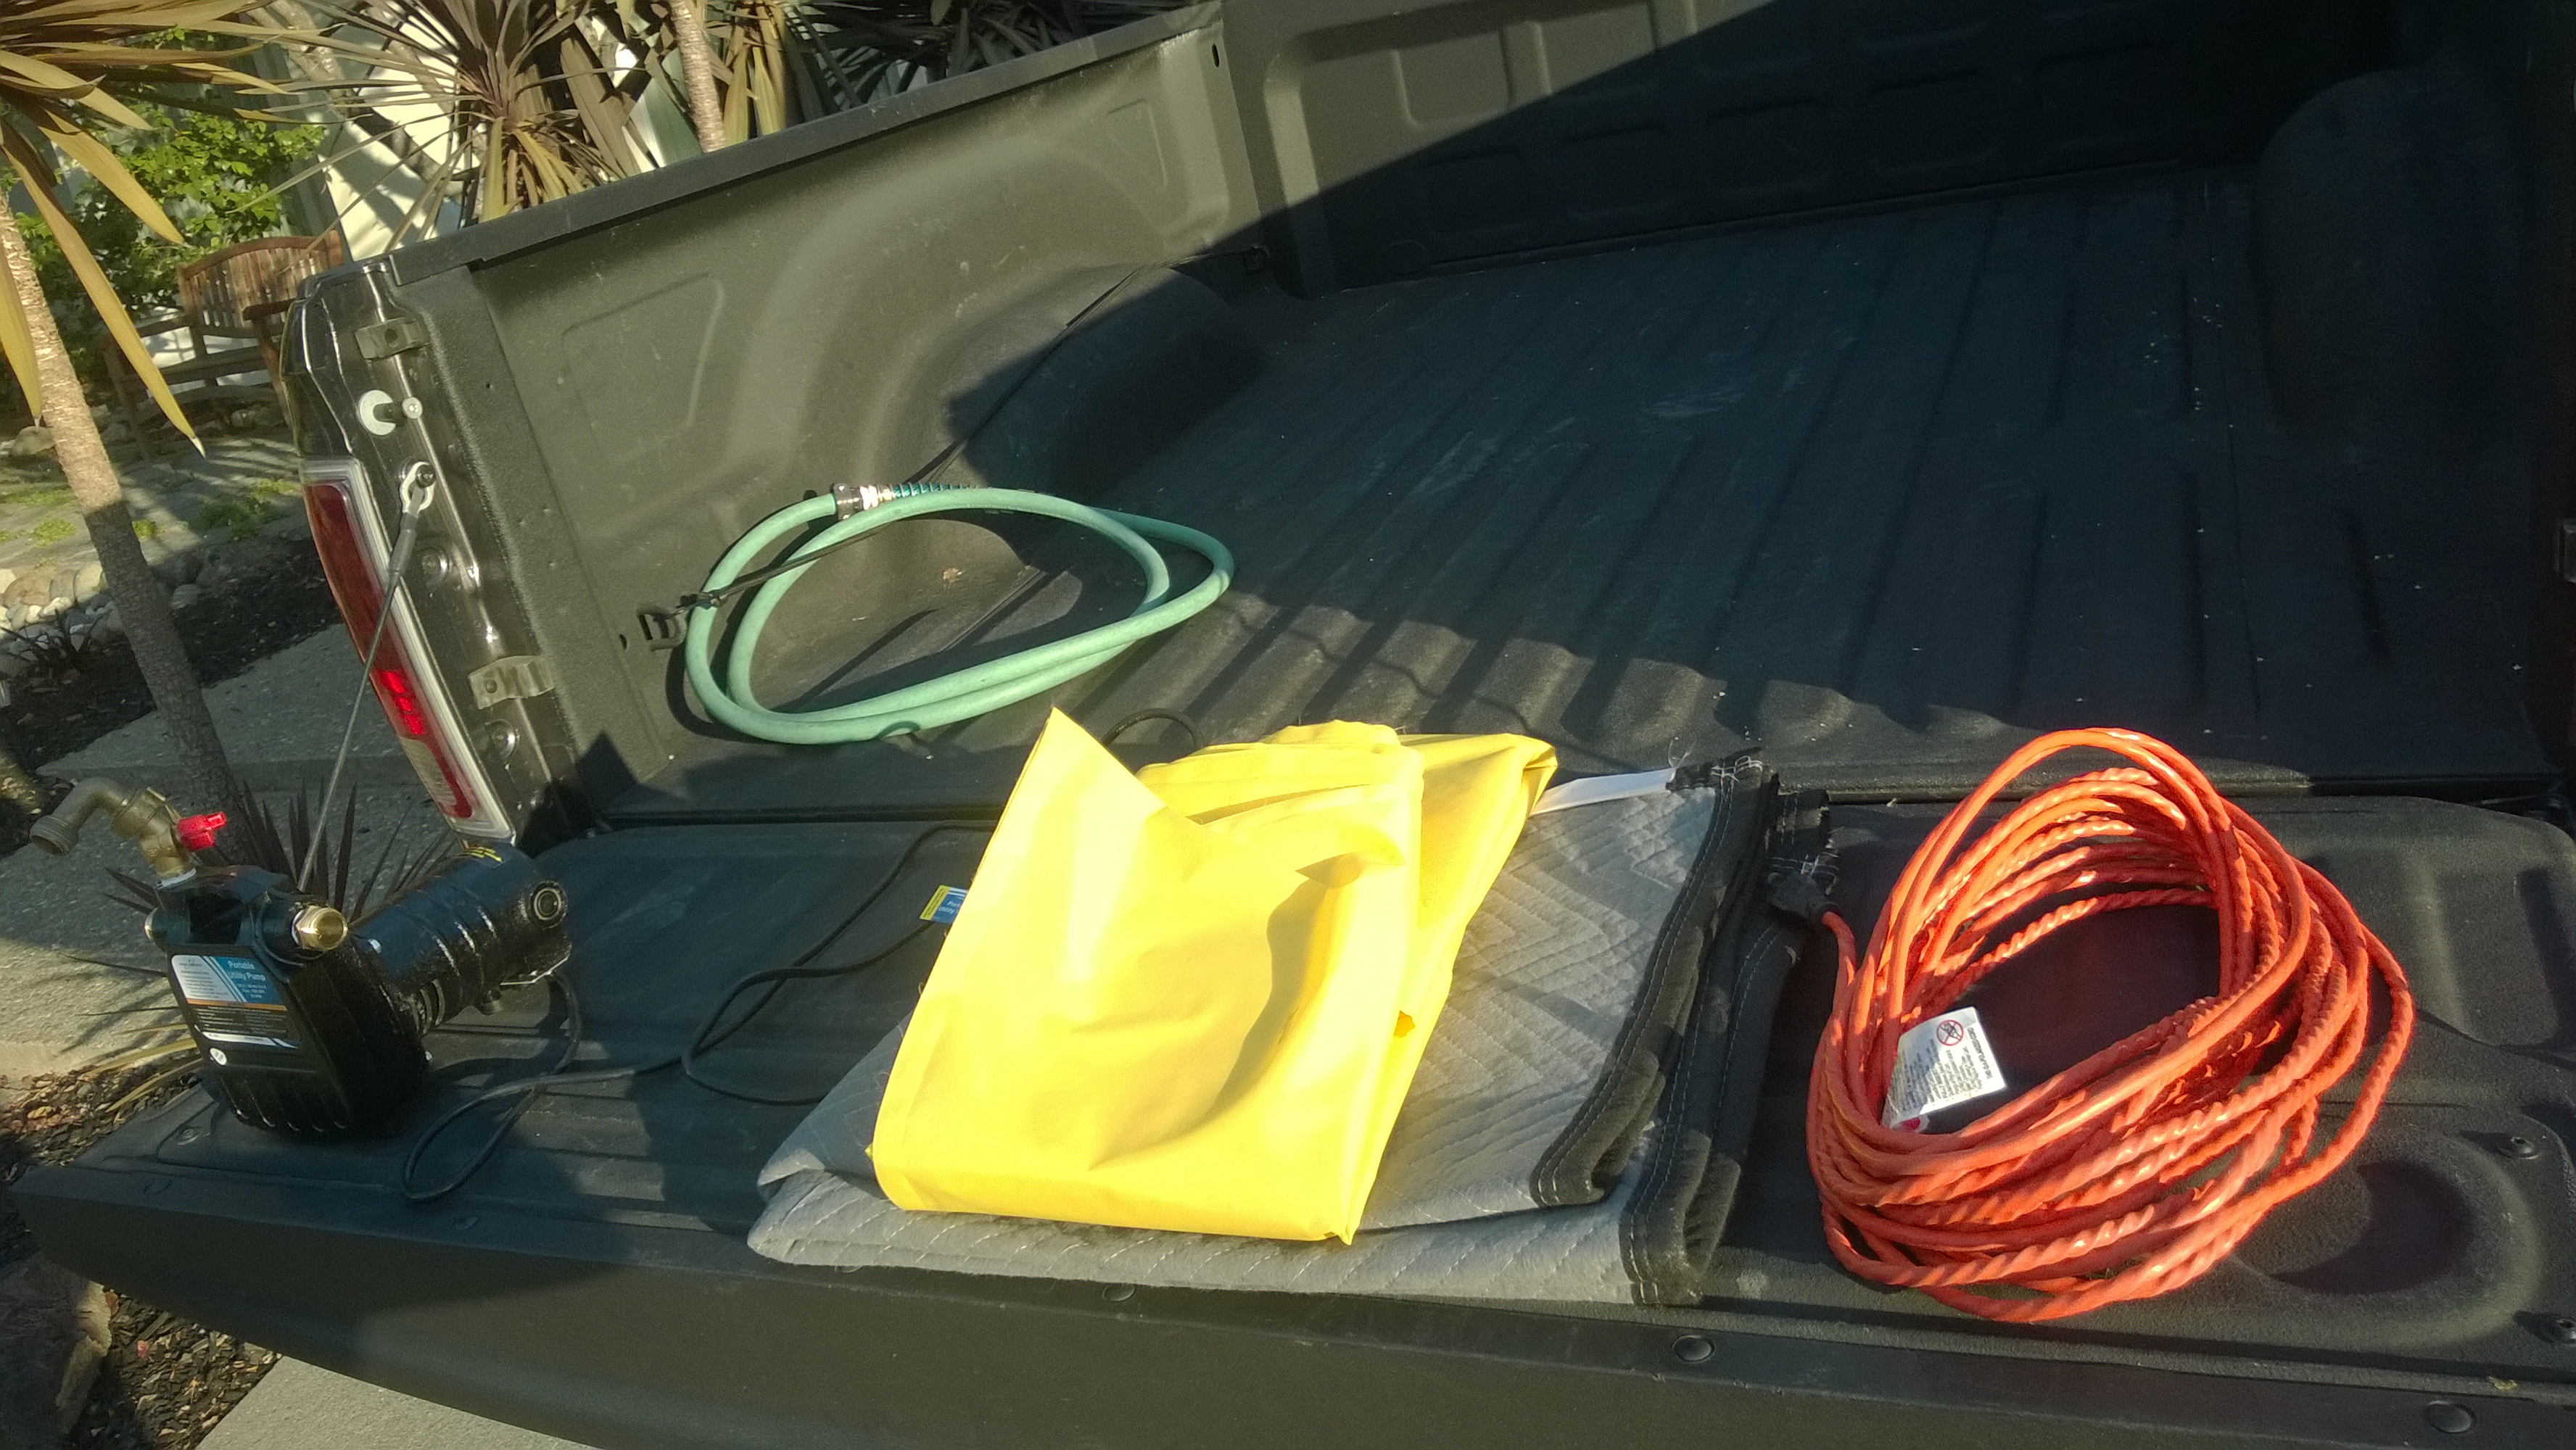
1500 GPH Utility Pump
I no longer use the 1/11th HP pump that claims it’ll put out 13 gallons per minute.
Tip: Instead, I have upgraded to a 1500 gallons per hour Hydrostar Utility Transfer Pump that I got from Harbor Freight for $66 shipped. I used a 20% off coupon that I had received in my email. It took care of taxes, and shipping and lowered the price just a little. Although, after my credit card number was compromised after using the site I can’t recommend buying it online. You’re better off standing in line at the store.
The pump comes with 2 hose bib fittings for a 3/4″ garden hose. I screwed those brass fittings in with some teflon tape on the threads to ensure a secure connection.
Trick: The red handled brass fitting on top of the pump is something I added to aide in priming the pump as the pump does not self-prime. Never “primed a pump” before? Learn how here.
If you look in the picture you’ll see a silver fitting that sits between my hose on the right and the semi-rigid 6″ hose connector before the pump. That is a hose shut-off valve between the tank and the pump. This allows me to have a spill-free hookup the pump and lets me choose when to add water to prime the pump and drain the bag.
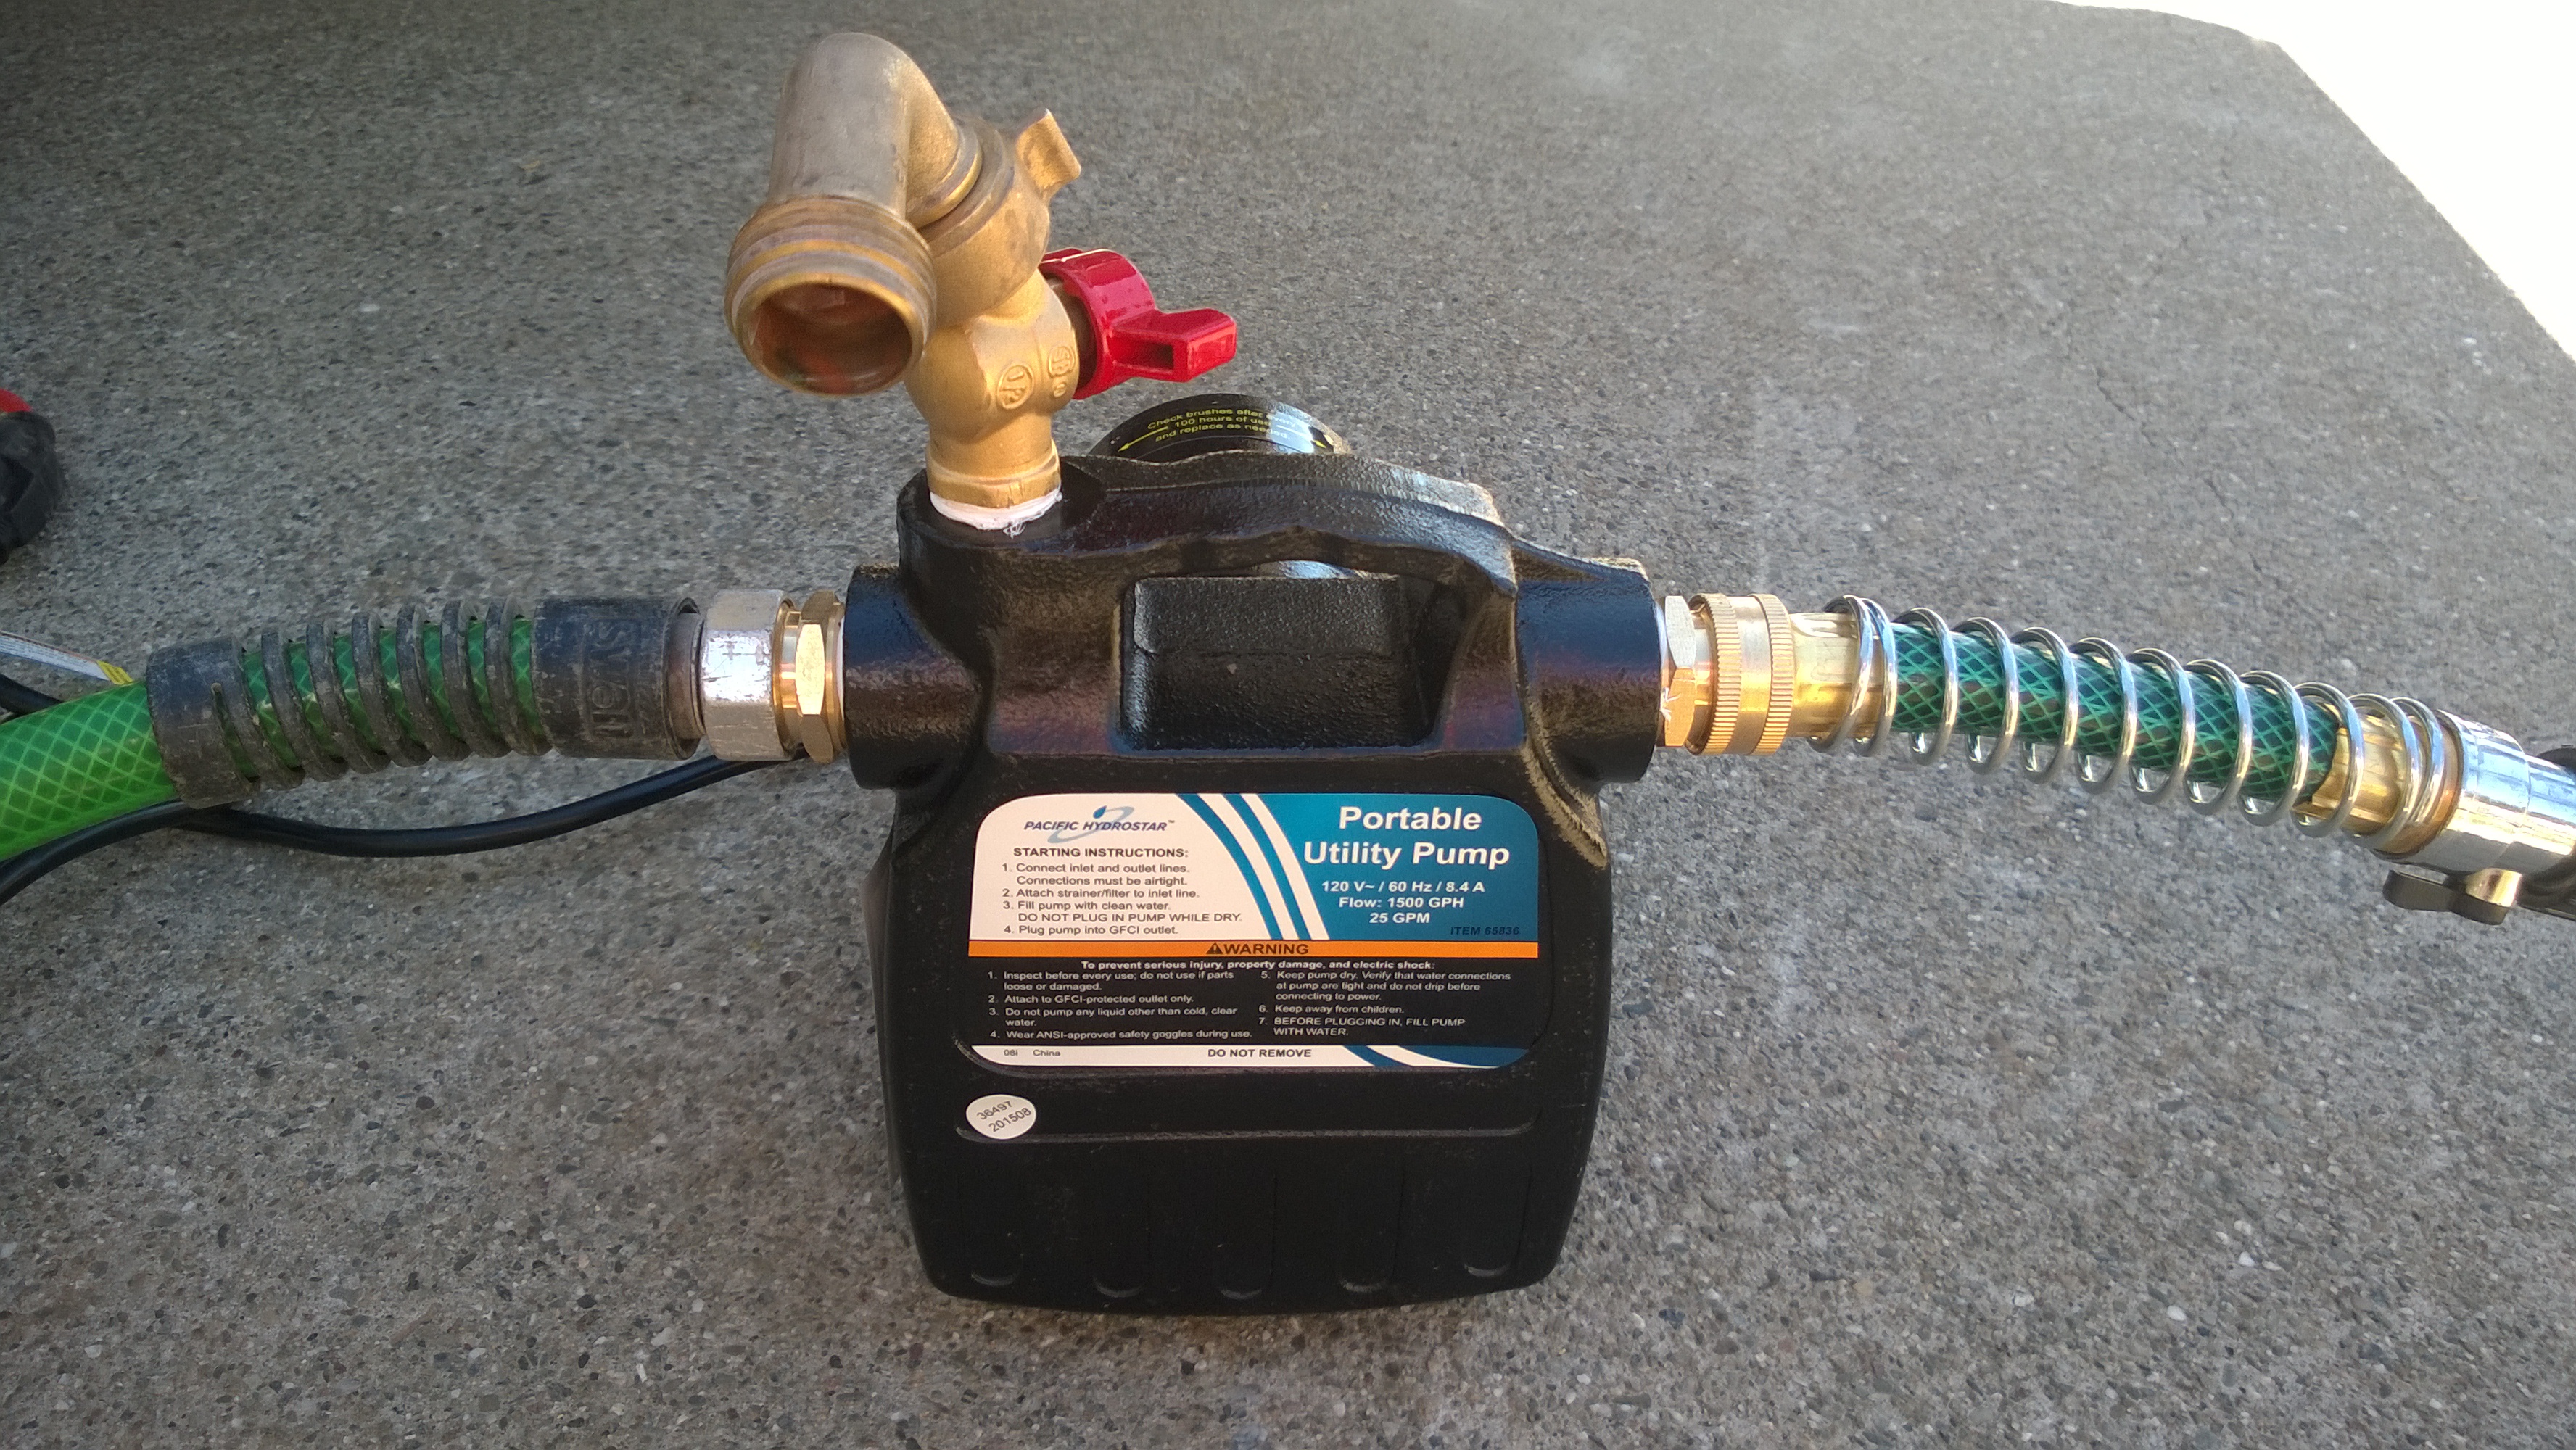
Pump with two brass fittings for easy priming.
The pump is very similar to the product you can buy at Home Depot called a Rigid Pro Transfer 1/2 HP Utility Pump except it costs half as much.
The output on this pump runs at 50PSI which is more pressure then I even get out of the hose spigot at the house.
Trick: When I primed the pump the first time, water shot straight out of the valve and hit me in the face. Since then I added a 90° elbow to direct the flow to the ground. I also fill the pump housing slower to stop the water waste on the driveway. You can hear the air being pushed out of the pump when filling it.
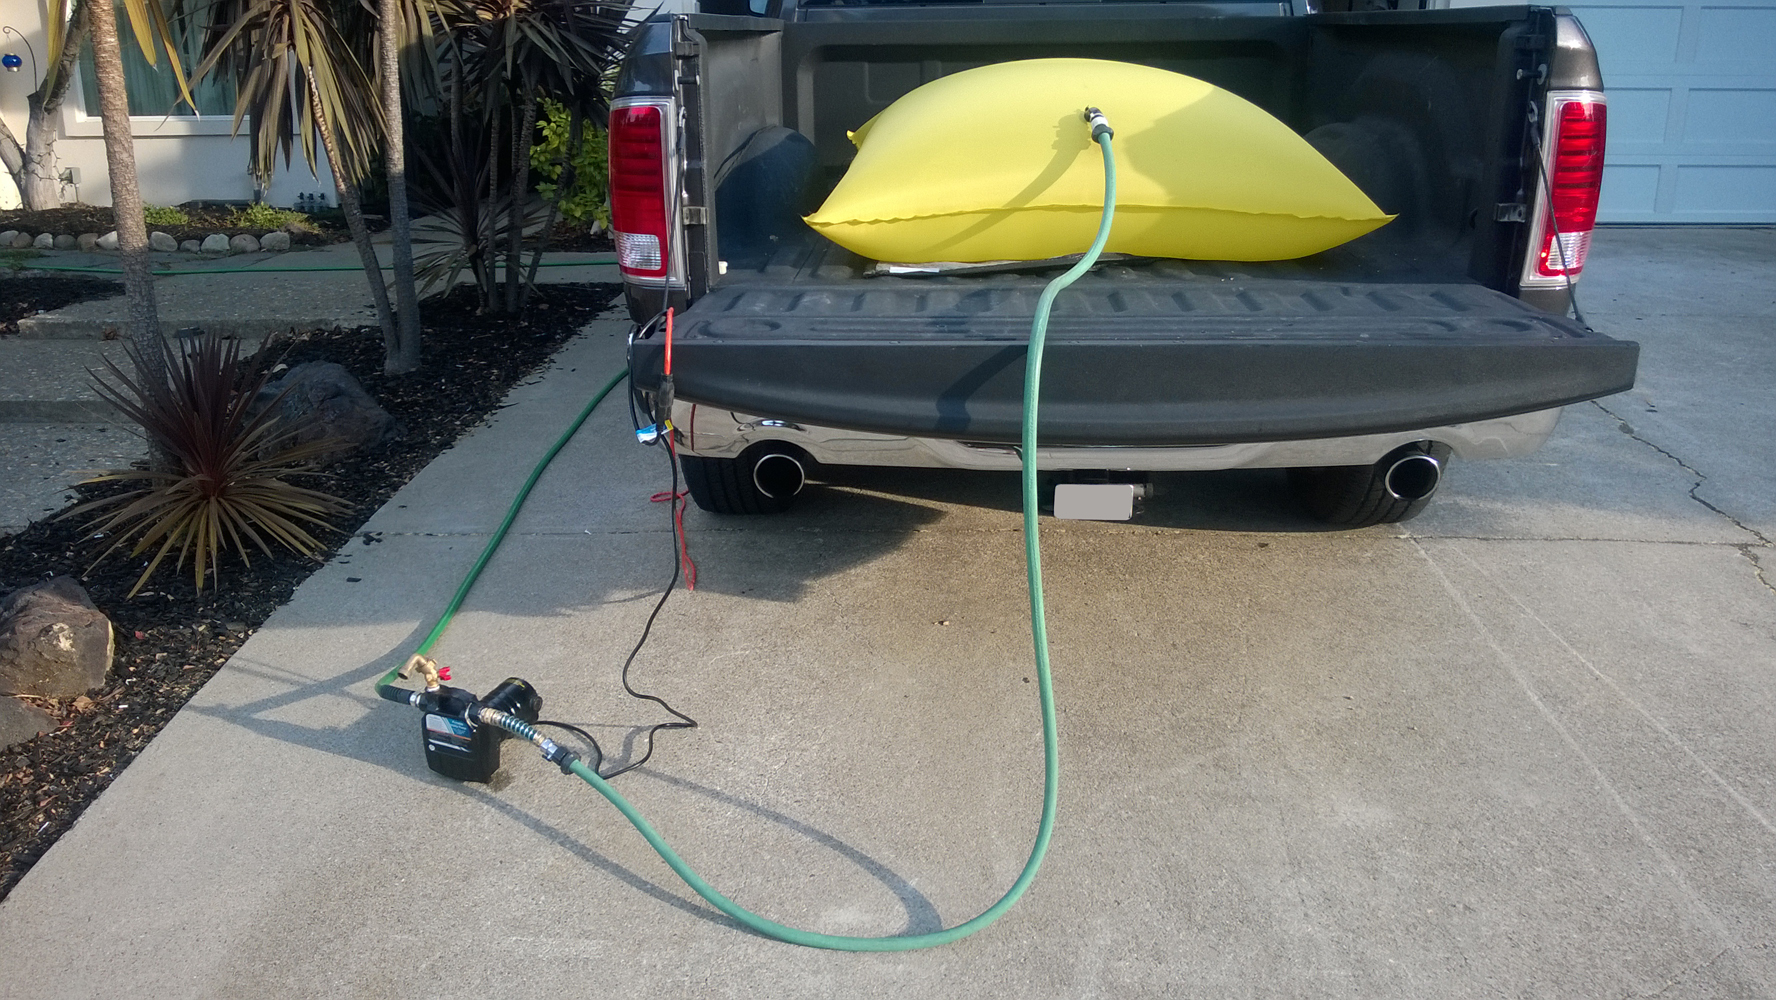
Full unloading setup in driveway.
As you can see, still have the same hoses, truck and bag. Just new pump. This is what it looks like after an afternoon haul. Lets see what else has changed.
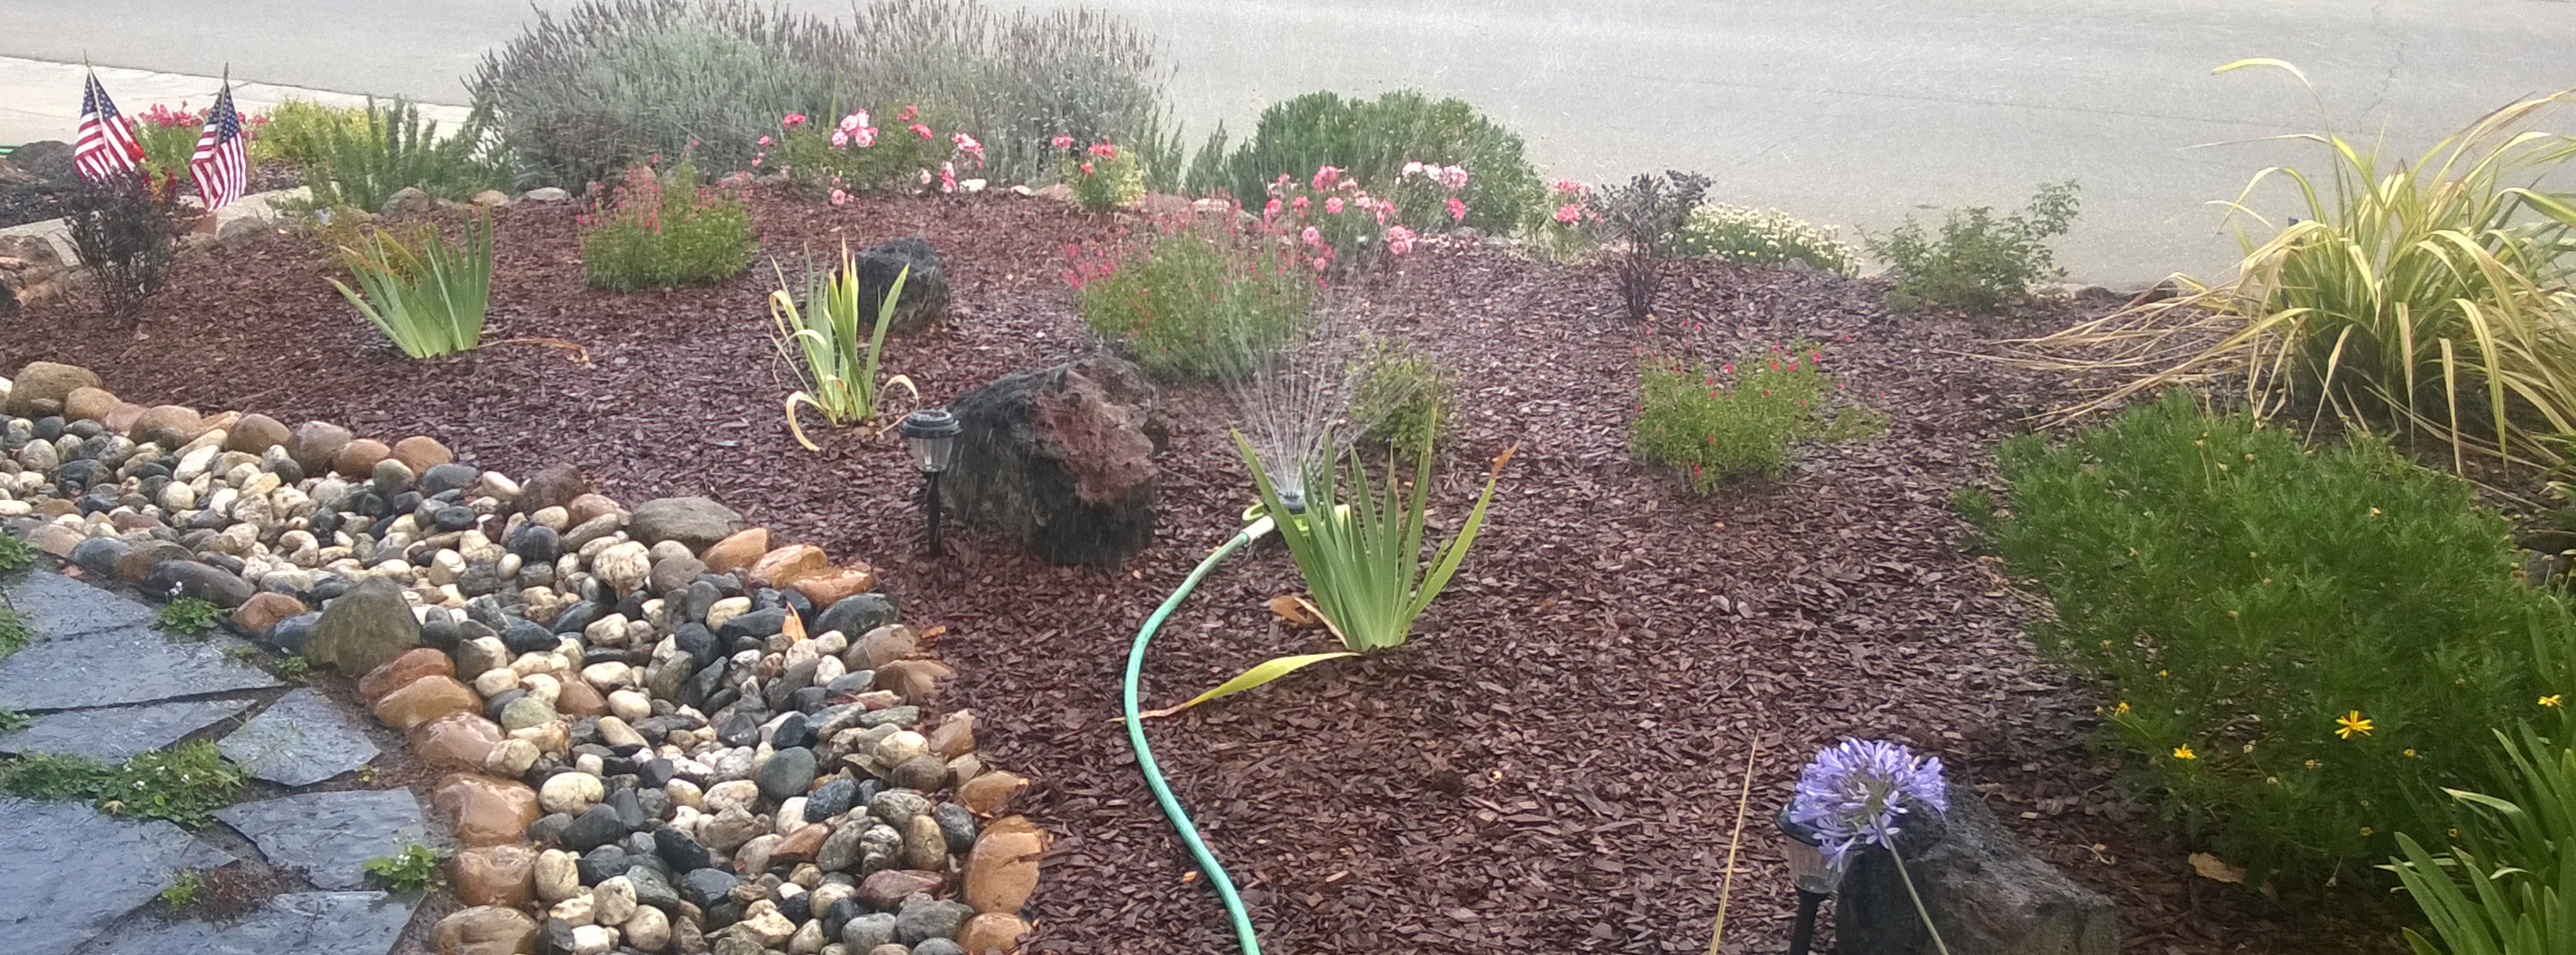
Since this pump puts out a healthy amount of pressure, I no longer hand water.
Tip: I’ve “invested” in some cheap plastic lawn sprinklers from Target and my neighbor picked up some impact sprinklers from Ace Hardware and I’m able to water two front yards at once.
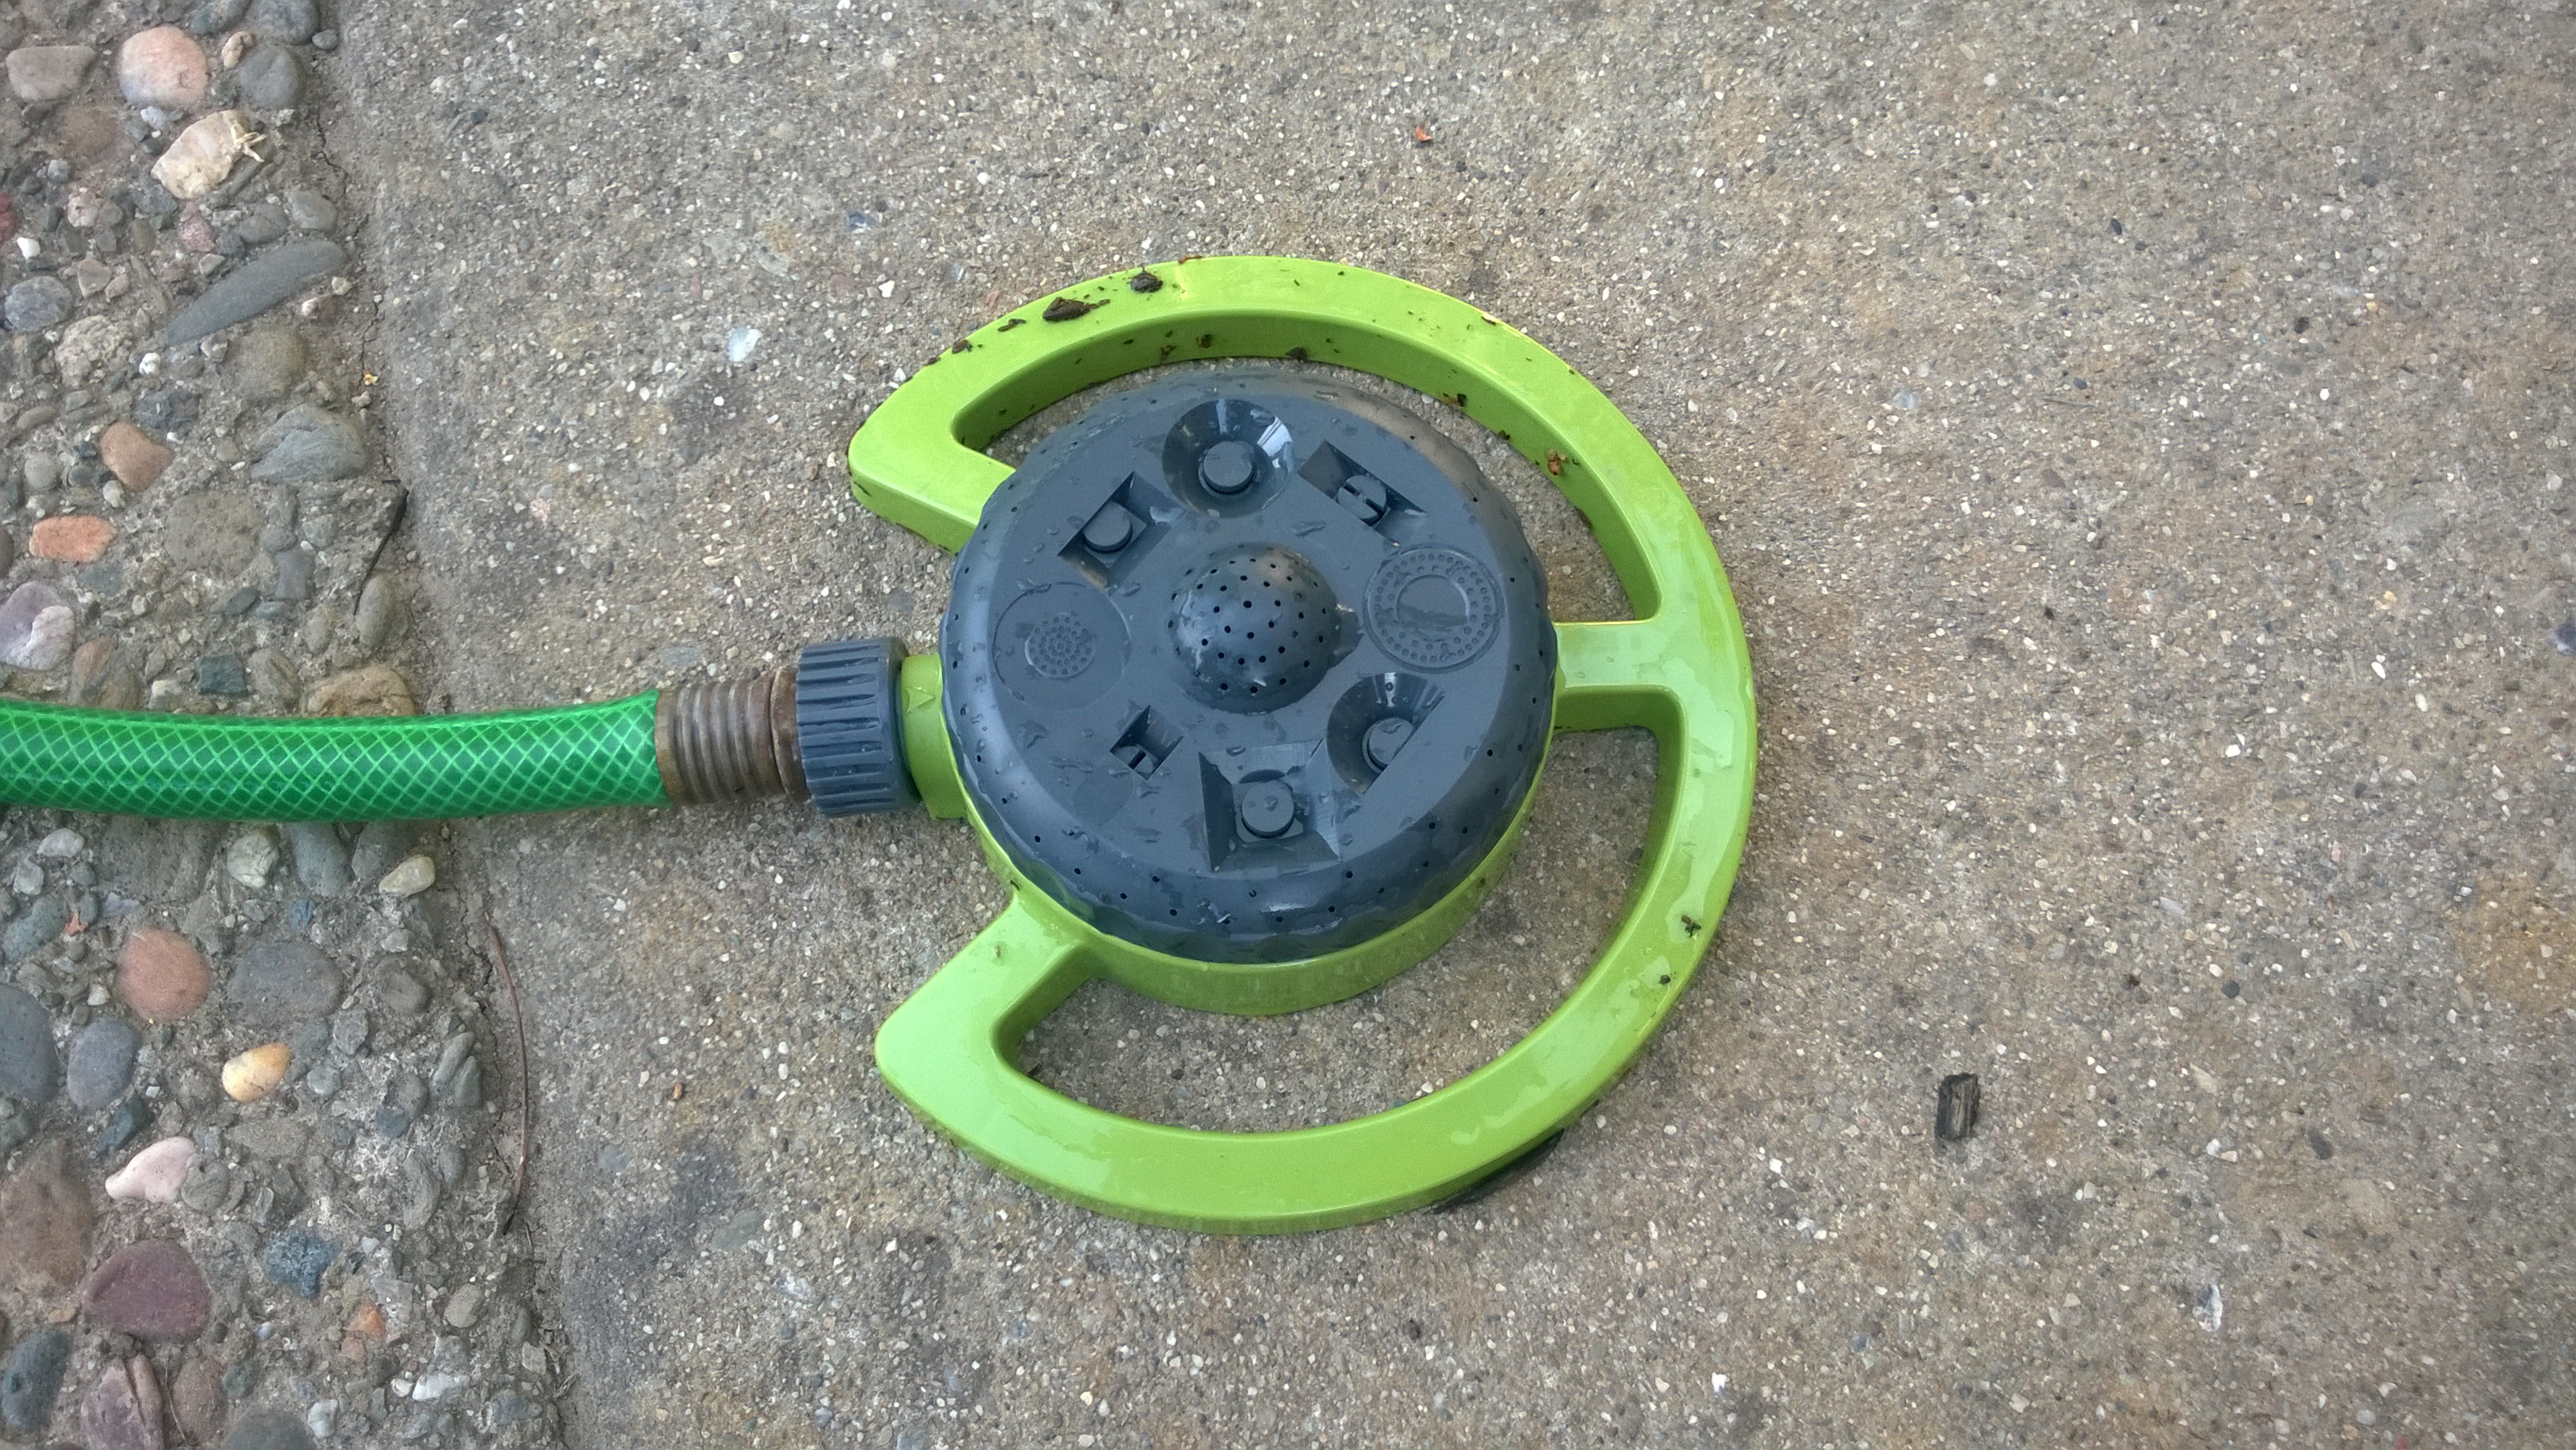
$5 Target lawn sprinkler.
The lawn sprinkler shown on the left was acquired from the Garden Section at the local Target store for $5. Its called a “RE Poly Turret Sprinkler-Green“. There are 8 spray patterns, but I will only use 2 of them. If you look close there is a dome in the middle with tiny holes and one on the outside edge. These two patterns allow for a “rain drop” life effect, and spray out about 34′ if its the only sprinkler on the circuit. The six other patterns just mist the water and nothing really gets to the ground.
Trick: I have been leaving the sprinkler attached the hose and leaving the hose in the yard. After each use, I roll up the hose so it unwinds easy for next use. The goal was to limit my setup time every time I came home with another load of water. You could say seeing Chris Rossiter’s setup had something to do with it.
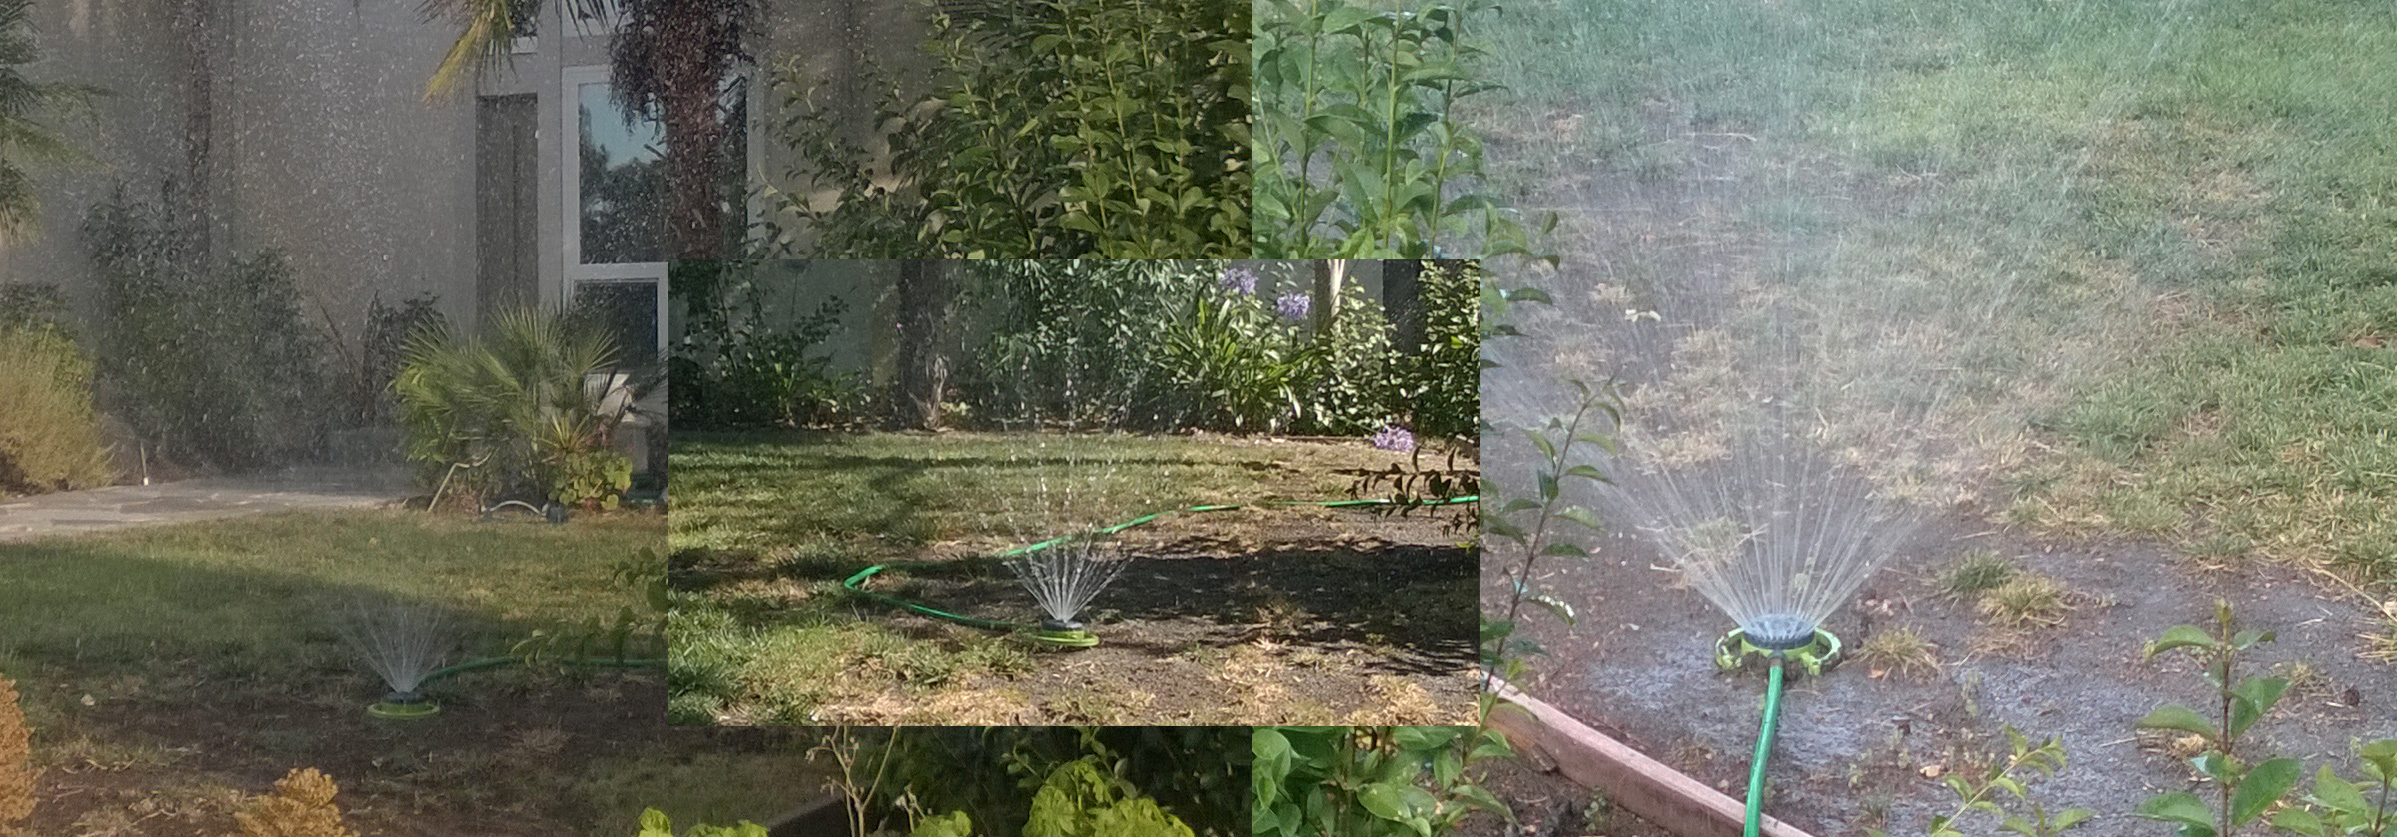
Left 2 shots show dome sprayer, right shows outer ring.
In the photo compilation on the right you can see the two sprayer functions I use on the lawn sprinkler. The left two shots shows the dome option in the middle, the right shot shows the outer edge.
Using the new pump and this lawn sprinkler, it takes about 25 minutes to unload the bag. So a savings of about 10 minutes compared to other, smaller pump and watering by hand.
Adding more sprinkler heads
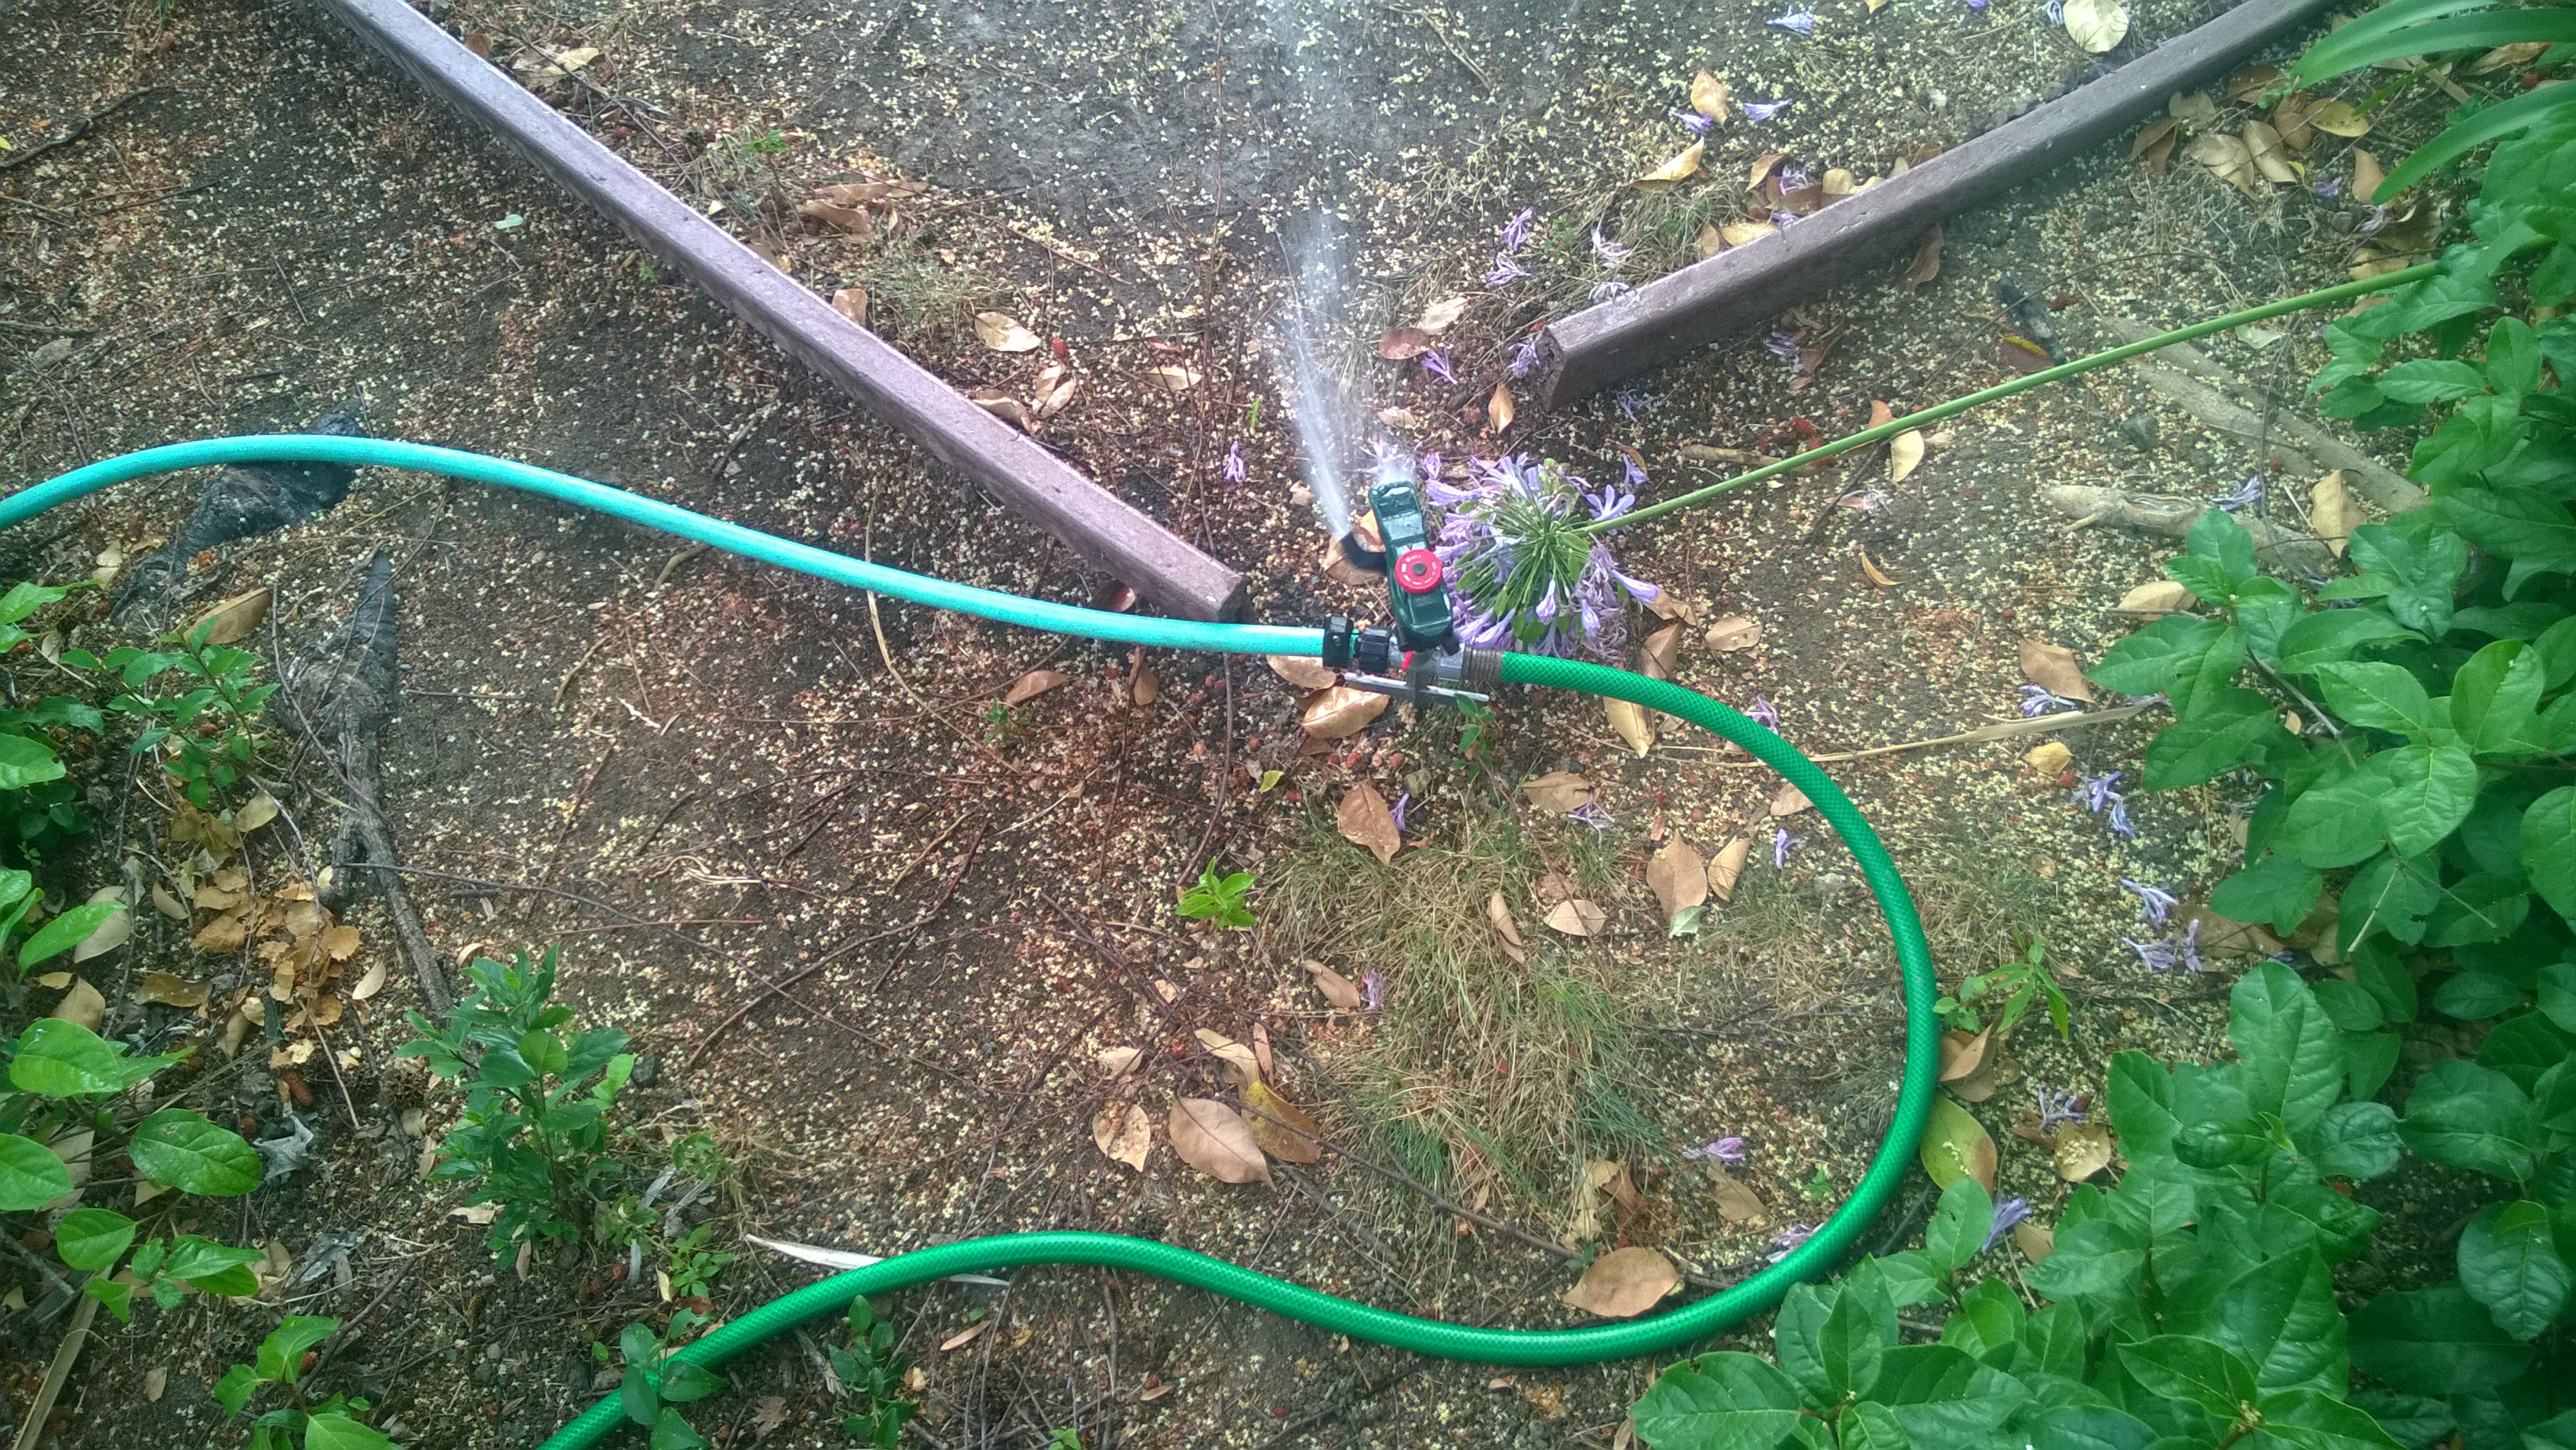
Ace Hardware impulse lawn sprinkler.
Like any irrigation system, adding more sprinkler heads to a single header can put more water in different places, but will also reduce pressure across all irrigation points. The same is true with putting a $10 Impulse Sprinkler in-line with the $5 lawn sprinkler above.
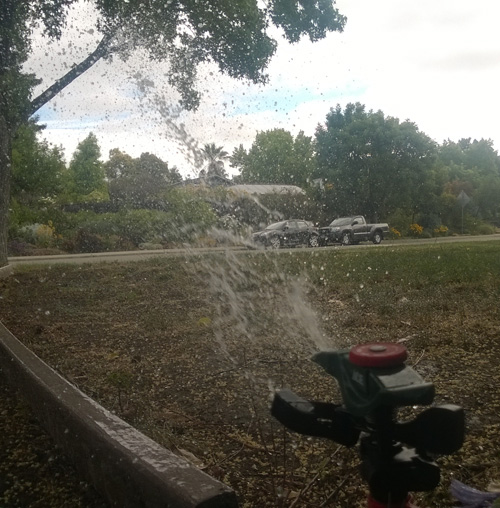
Action Shot
This morning my neighbor gave me an impulse sprinkler he had picked up from Ace Hardware. It has a small end cap so I can plumb it inline with the lawn sprinkler.
Tip: I grabbed the discharge hose from my pump, attached it to the right side of the sprinkler head, grabbed another “throw-away” hose (because it has so many kinks/repairs its almost useless) and plumbed that the the lawn sprinkler. Now with these two irrigation tools I can water his lawn and my front garden in one fell swoop.
I didn’t pay attention to the clock to figure out how long it took to unload the bladder. I’ll have to try again tomorrow and update this post. But it did allow me to do some thinking on how I can make this setup look better and still function. I’ll have to test the theory out with a quick trip to Home Depot this afternoon.
Here is a shot of the sprinkler watering the plants in the front yard. Its the second downstream irrigation component from the impulse sprinkler. The reduced pressure means it doesn’t spray as high or as far, but that’s fine. At least I can sit and enjoy my handiwork while recycled water works to keep the plants growing. The ground is moist under the mulch which was expected, and my water bill has remained well below the 25% reduction from the water company.
At least with this setup, clean up is a breeze and all components fit in a space smaller than the tailgate. 🙂
Cleanup still a breeze.
DIY: How To Build a Garden Hose from Drip Irrigation Parts – A part 2 of this article.
I’ll update in a month or two on how the lawn looks after watering this way. I am hoping for the best. 🙂
Leave a Reply